How to change Camera Configuration
Caution
This feature is intended for project administrators.
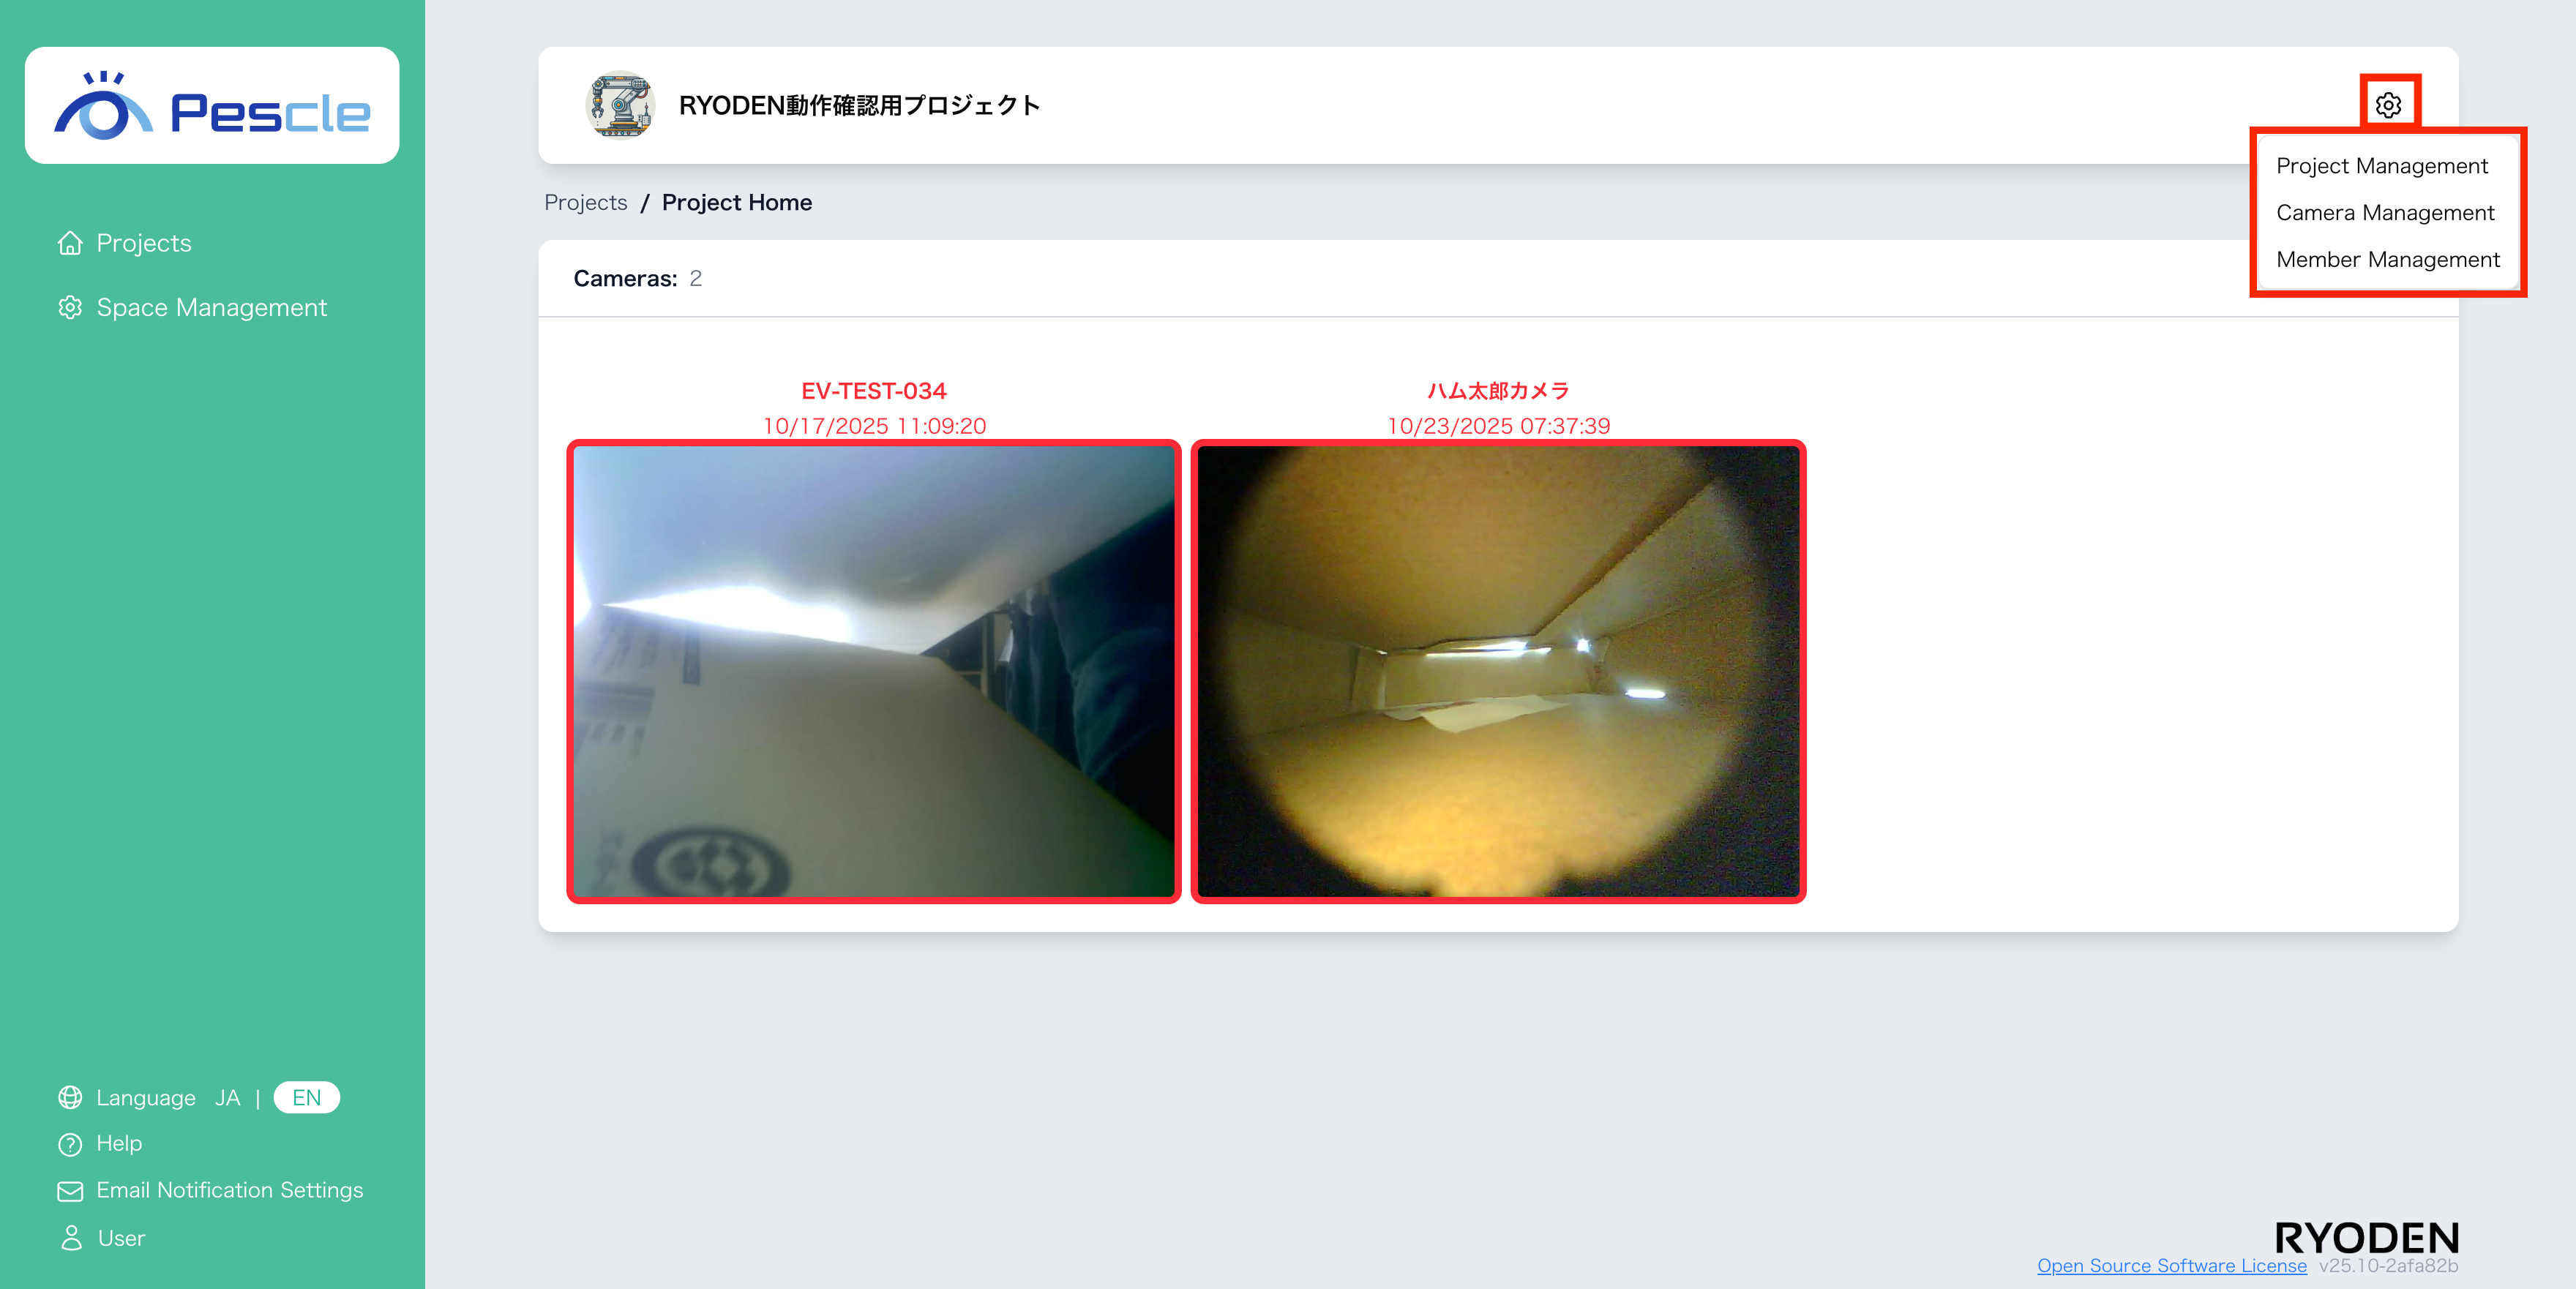
You can access this from the project home screen by clicking the gear icon in the upper right corner.
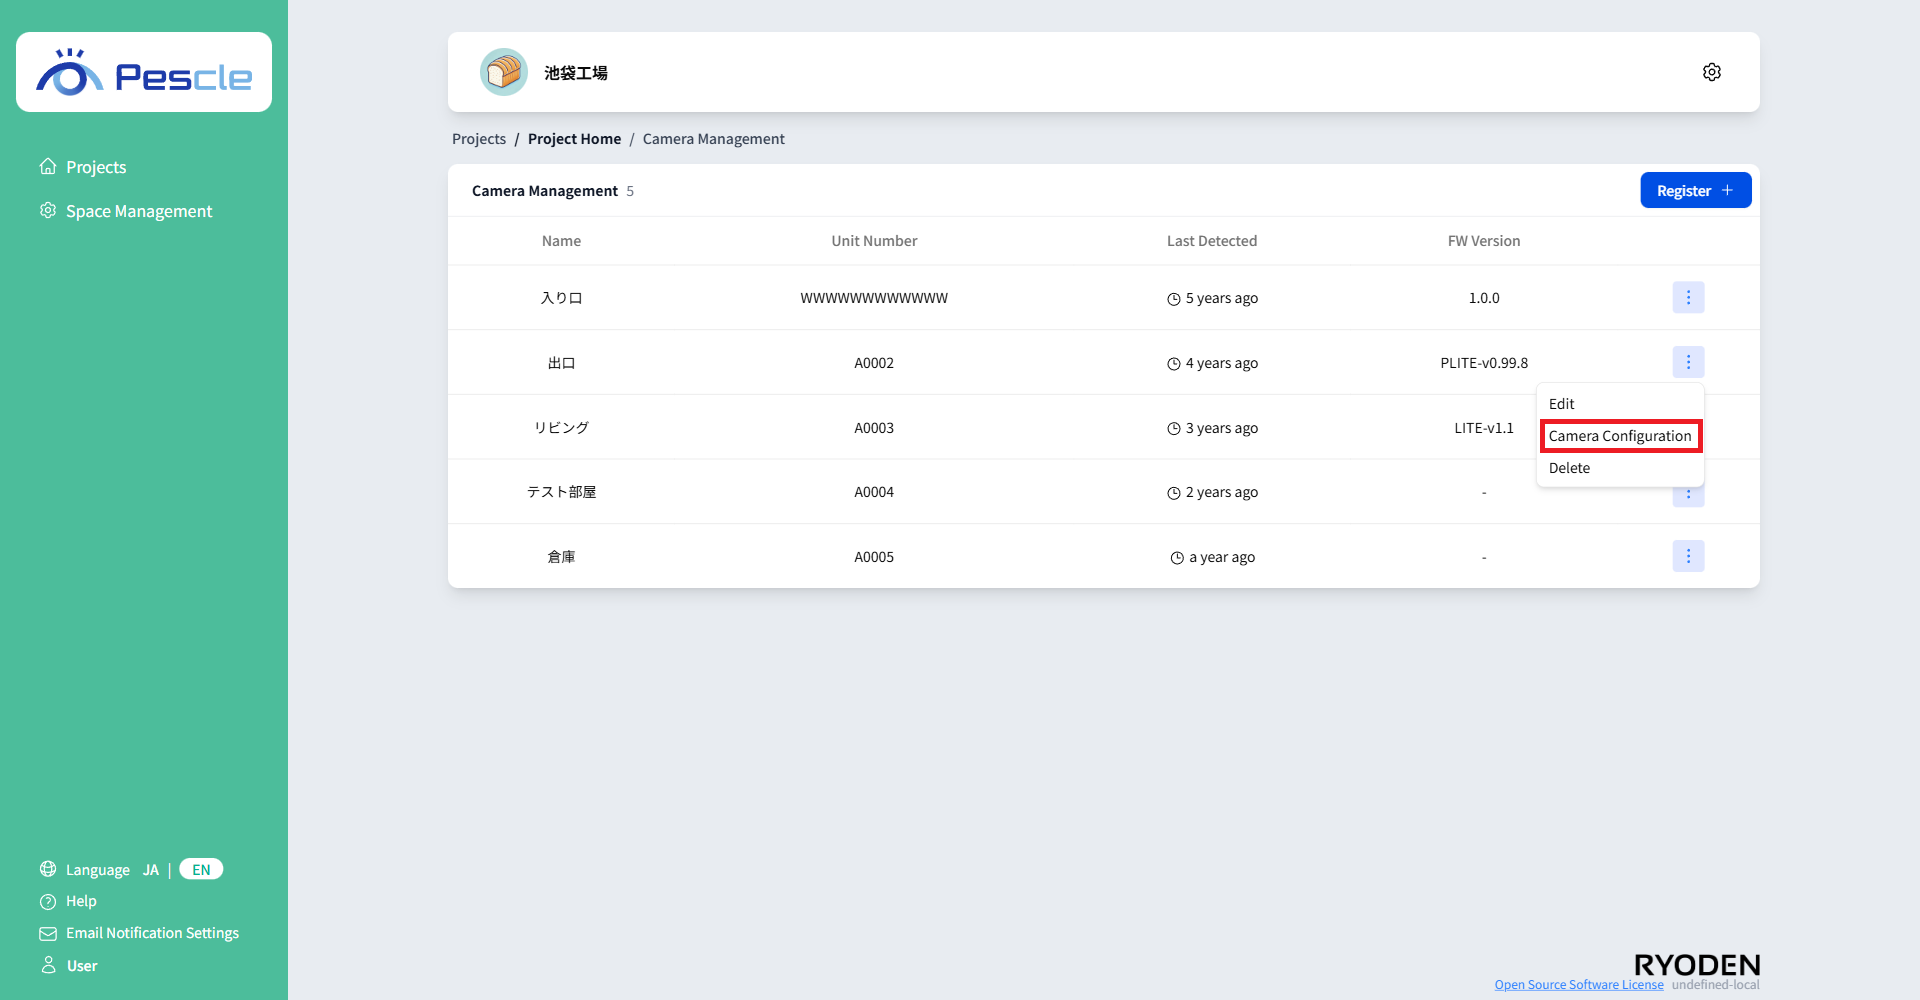
When the camera management screen appears, click the vertical ellipsis to the right of the camera you want to manage.
When the submenu appears,click “Camera Configuration”.
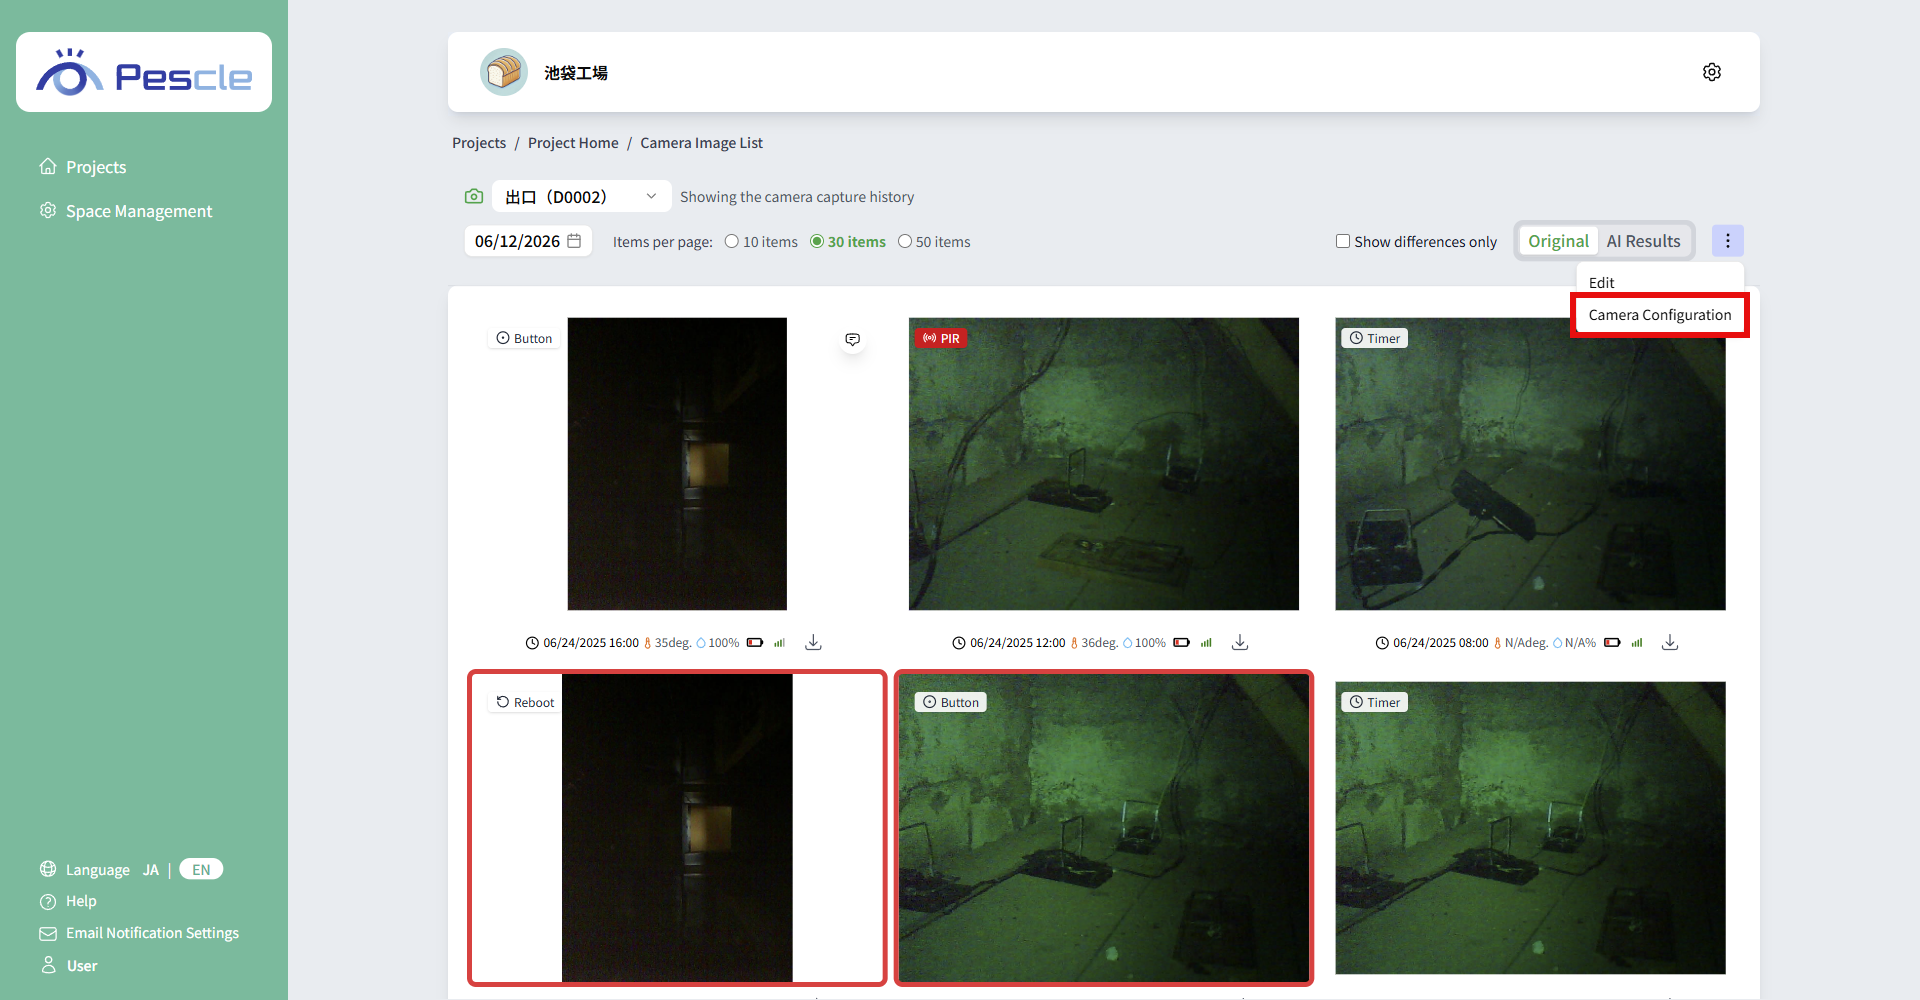
You can also open it from the vertical ellipsis in the top right corner of the camera image list page.
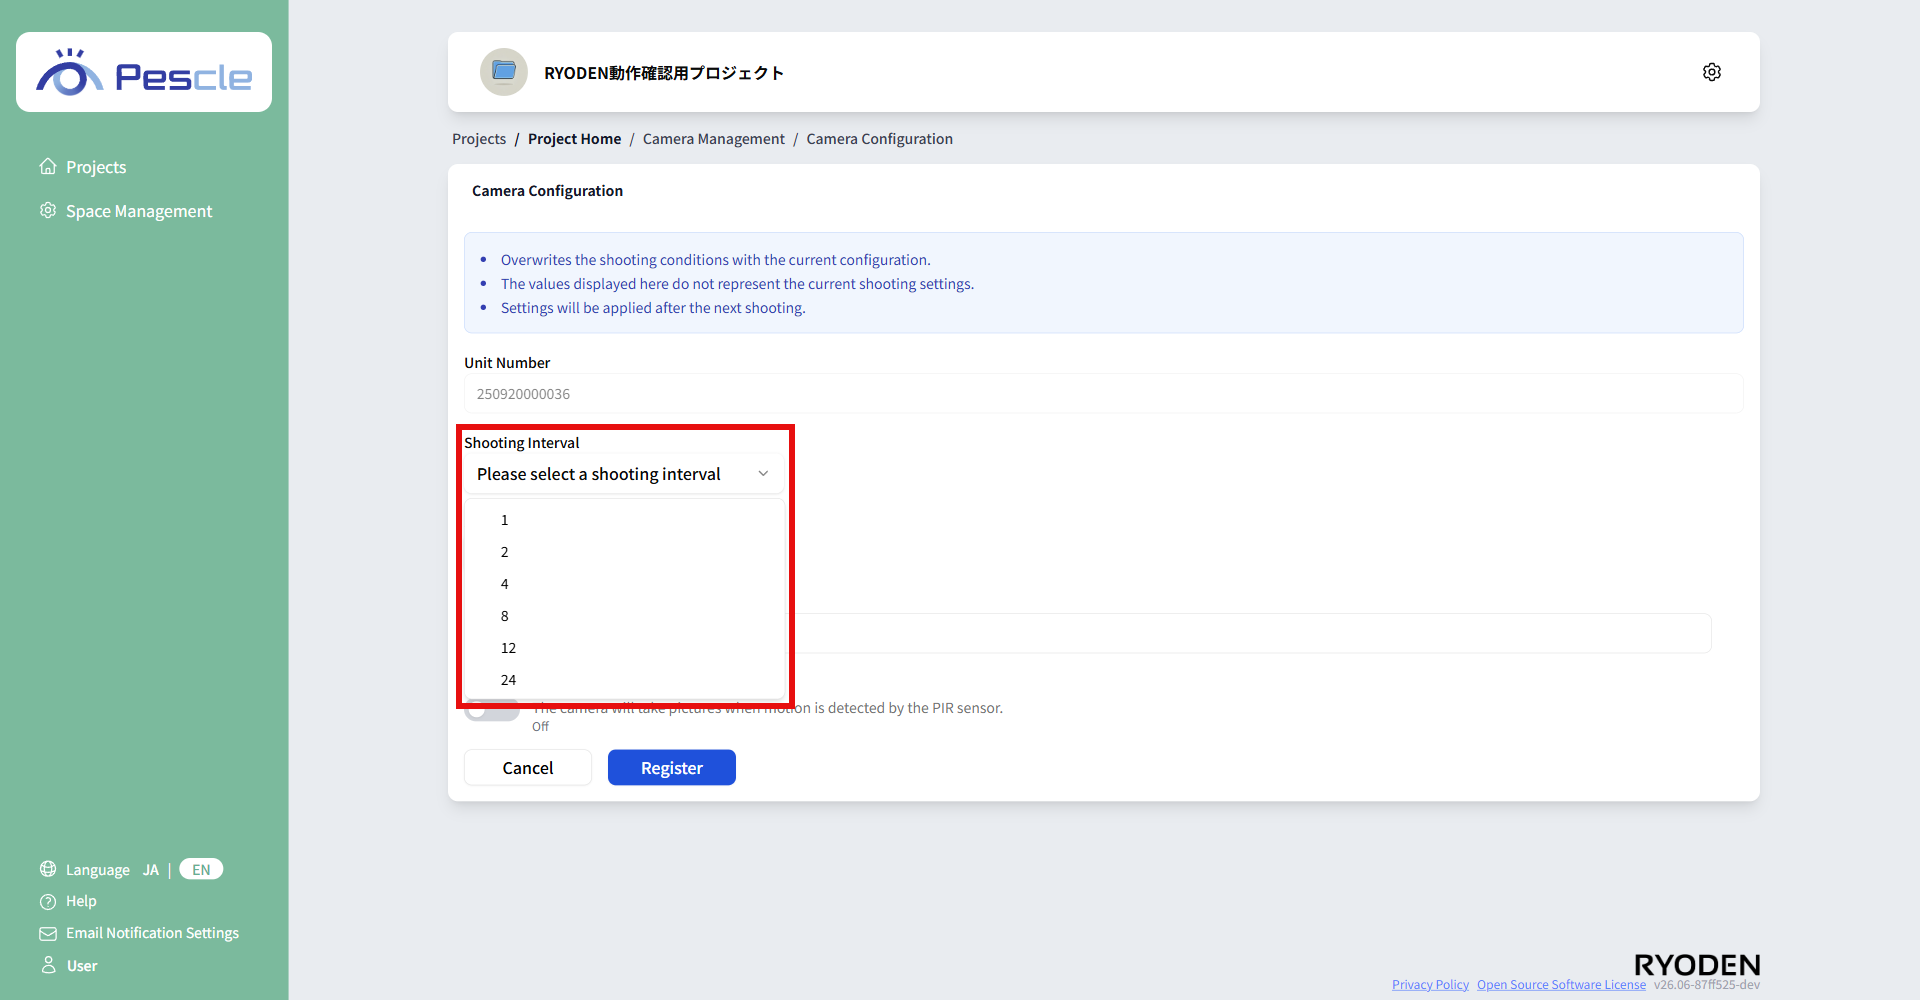
Setting the shooting interval
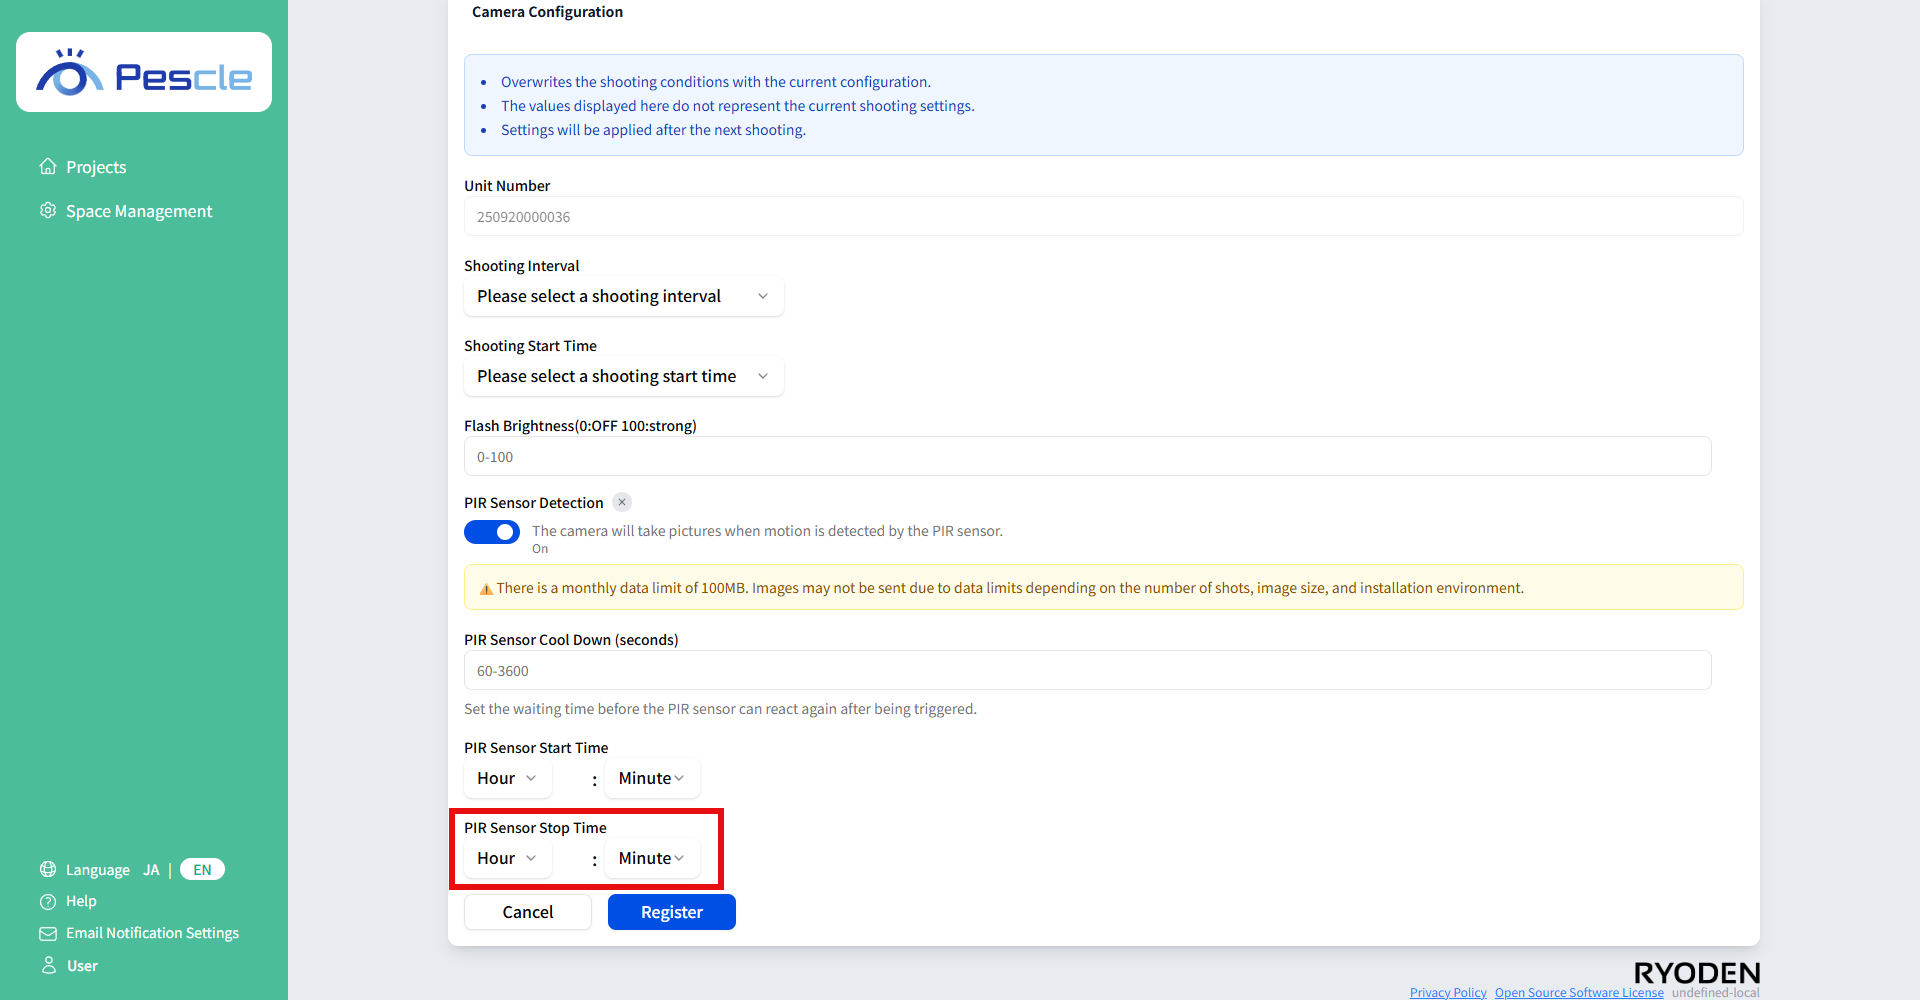
When the shooting settings screen appears, select the shooting interval from six options.
Once you have completed the entry, click the “Register” button.
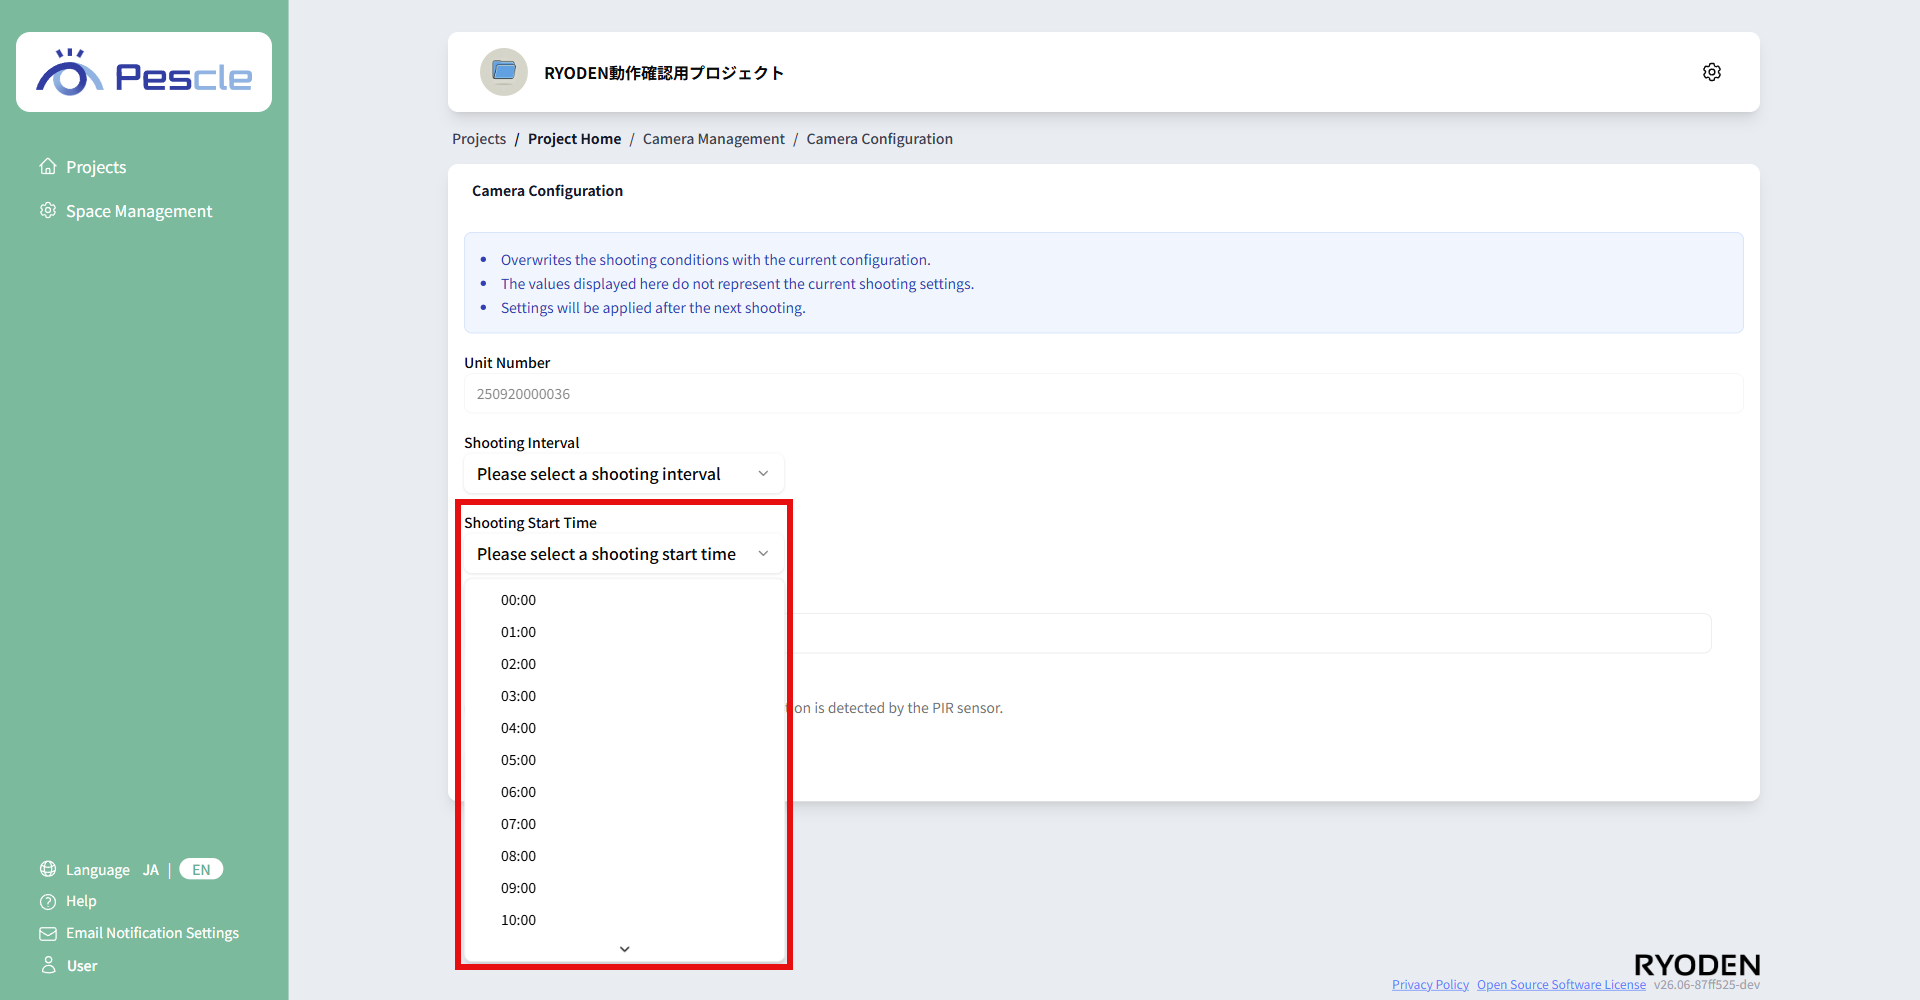
Set the shooting start time
Select the shooting start time from 00:00-23:00.
Once you have completed the entry, click the “Register” button.
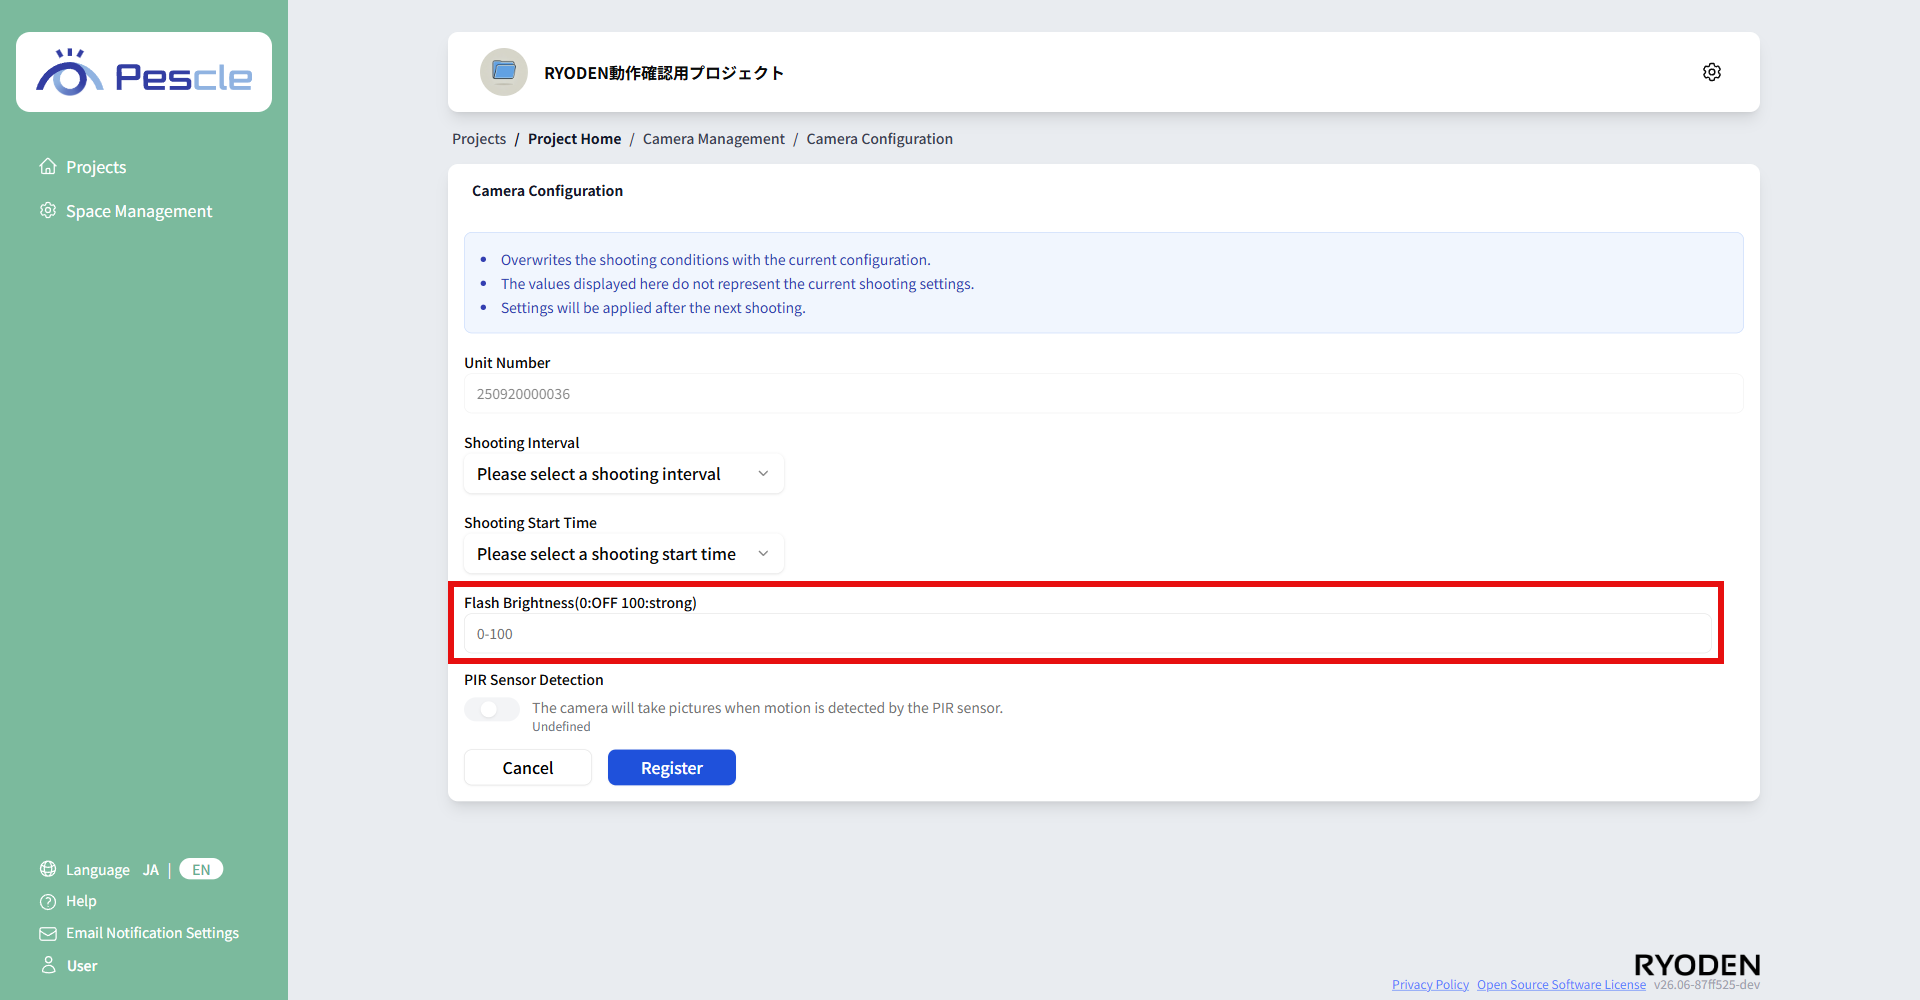
Setting the flash brightness
Enter the flash brightness.
You can enter a value between 0 and 100.
0 is OFF and 100 is the strongest.
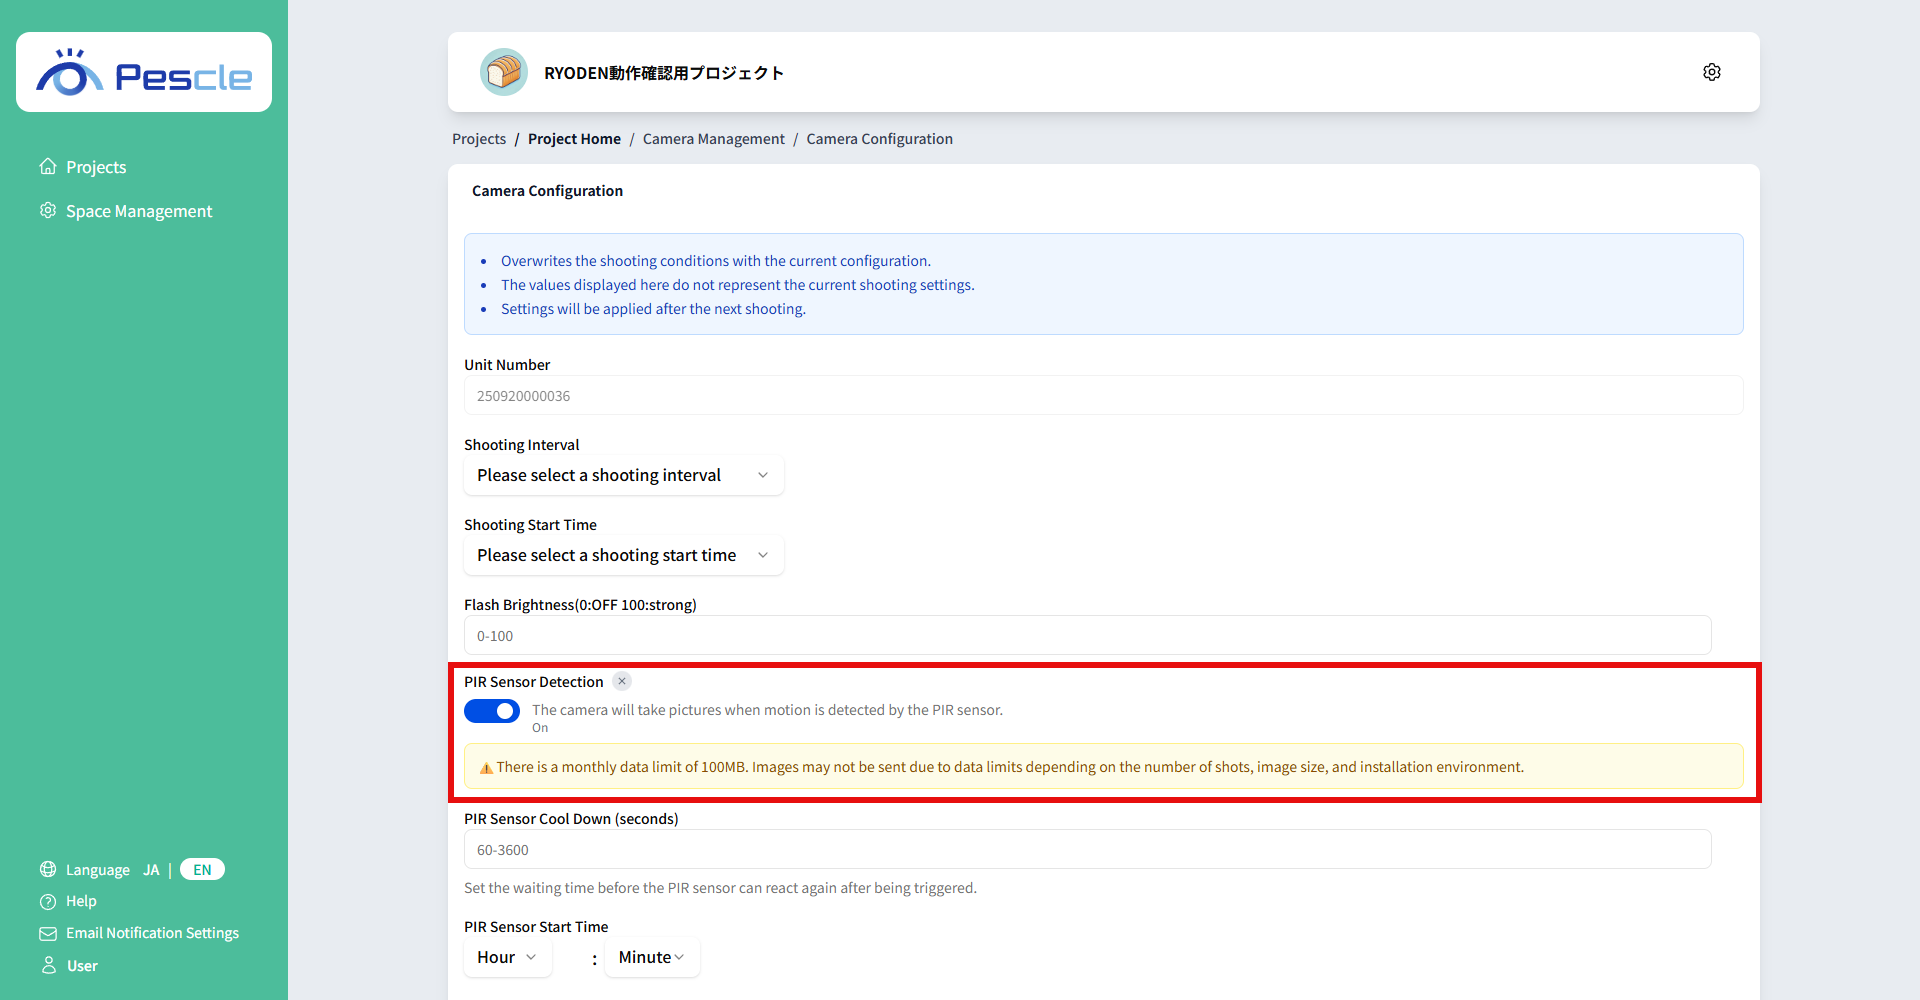
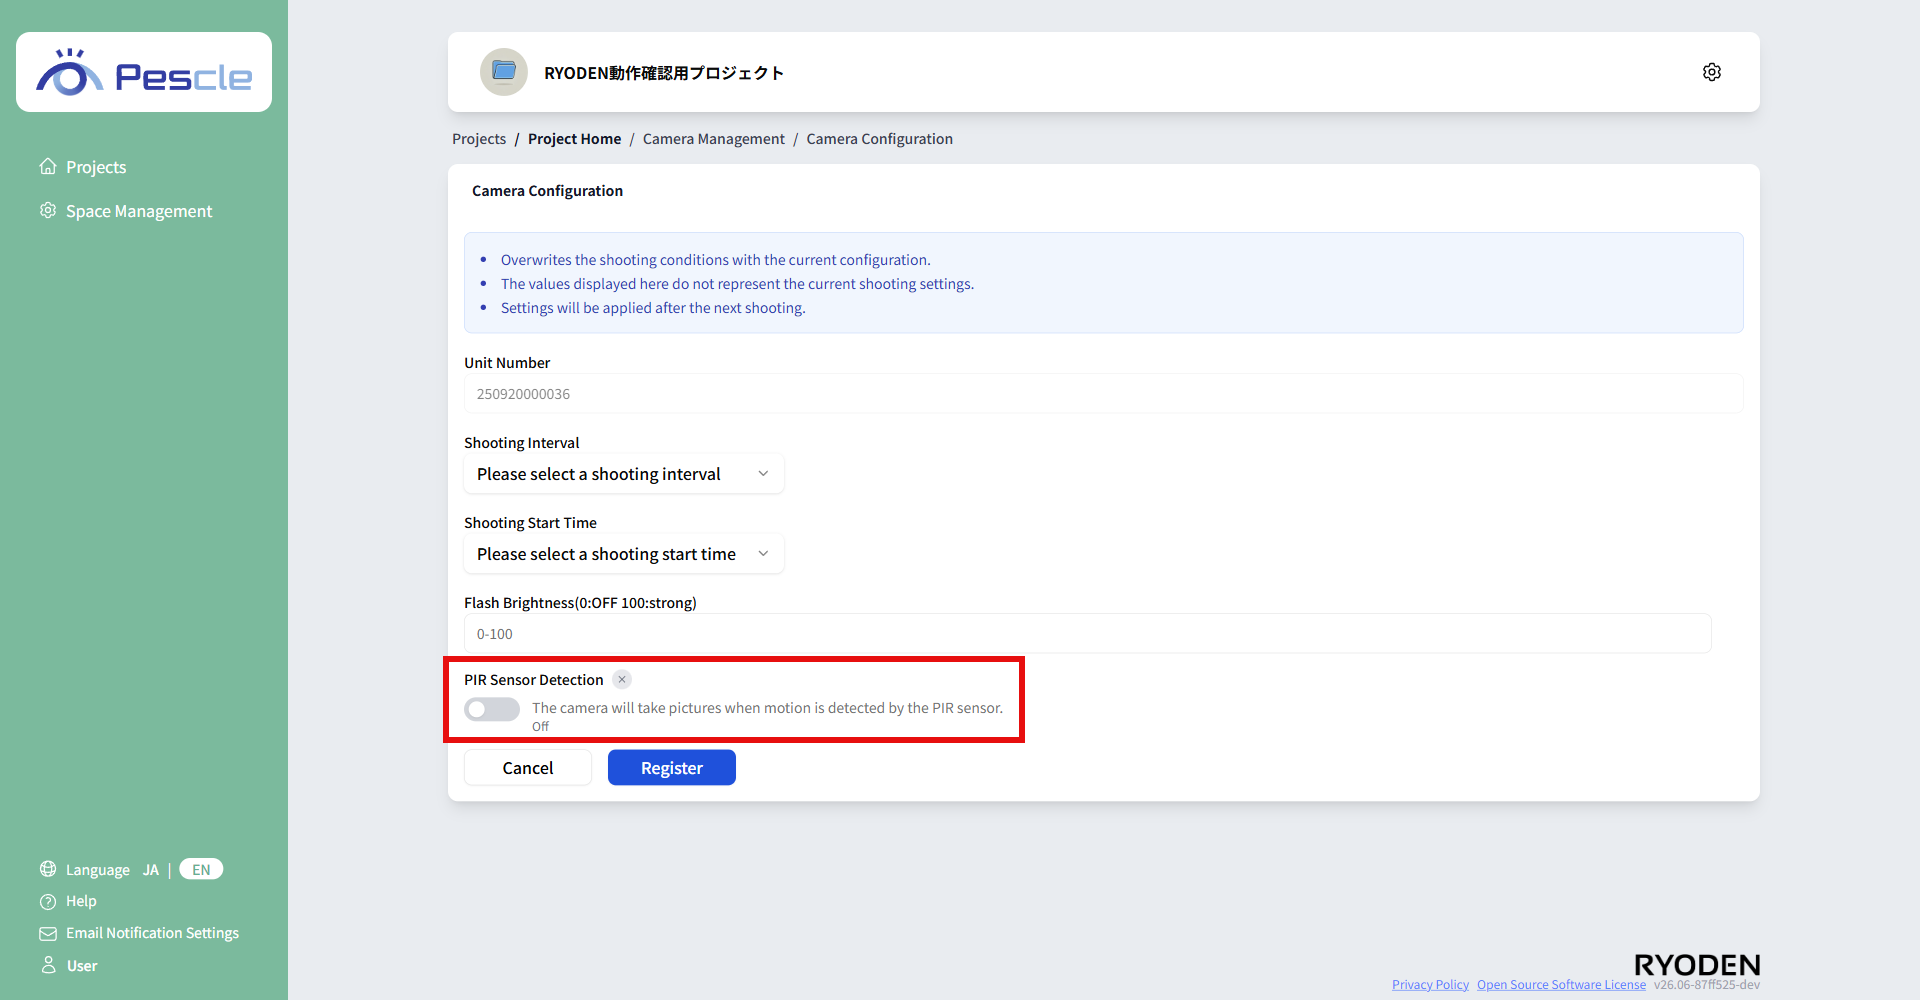
Setting up PIR sensor detection
This setting allows you to take a photo when the PIR sensor detects motion.
There are two types of PIR sensor detection:
Enable PIR sensor detection
To enable PIR sensor detection, turn the toggle switch ON.
Disable PIR sensor detection
To disable PIR sensor detection, turn the toggle switch to OFF.
Tip
The items below will be displayed and can be set when PIR sensor detection is enabled.
Set the PIR sensor cooldown time (seconds)
Enter the PIR sensor cooldown time (seconds).
You can enter a value between 60 and 3600.
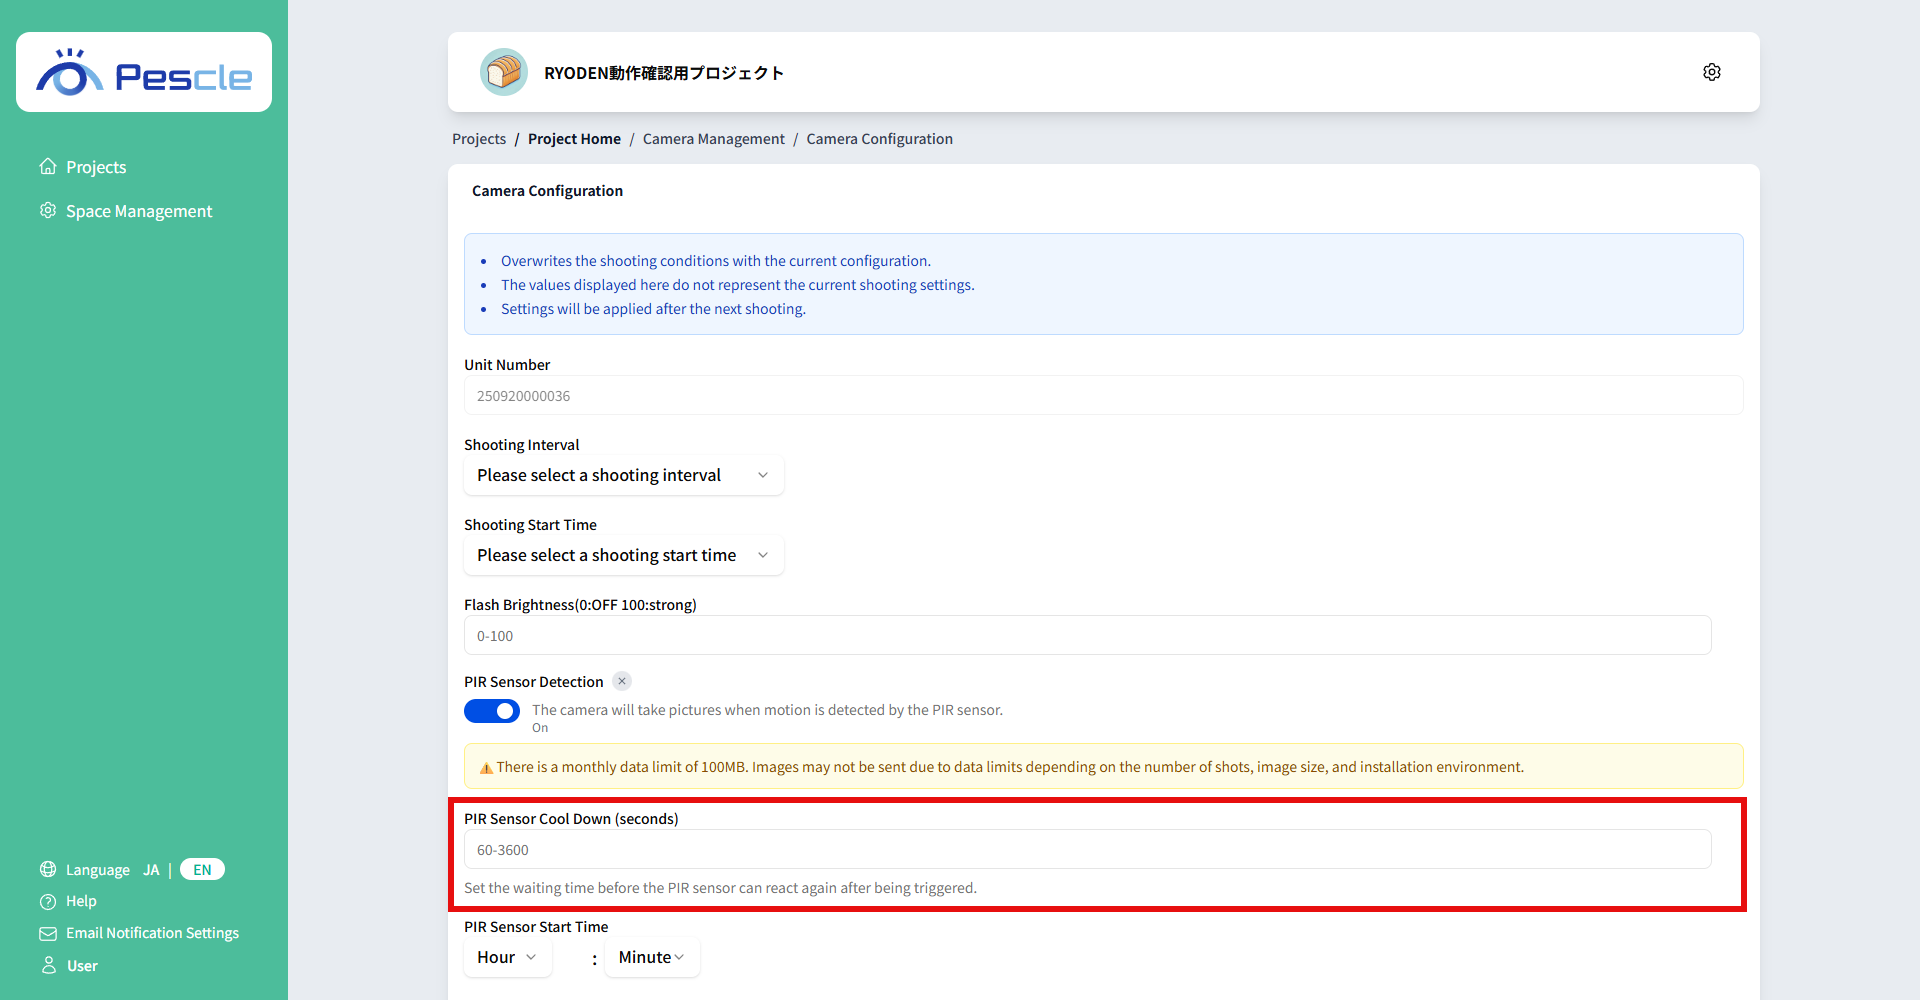
Set the PIR sensor activation time
Select the PIR sensor activation time.
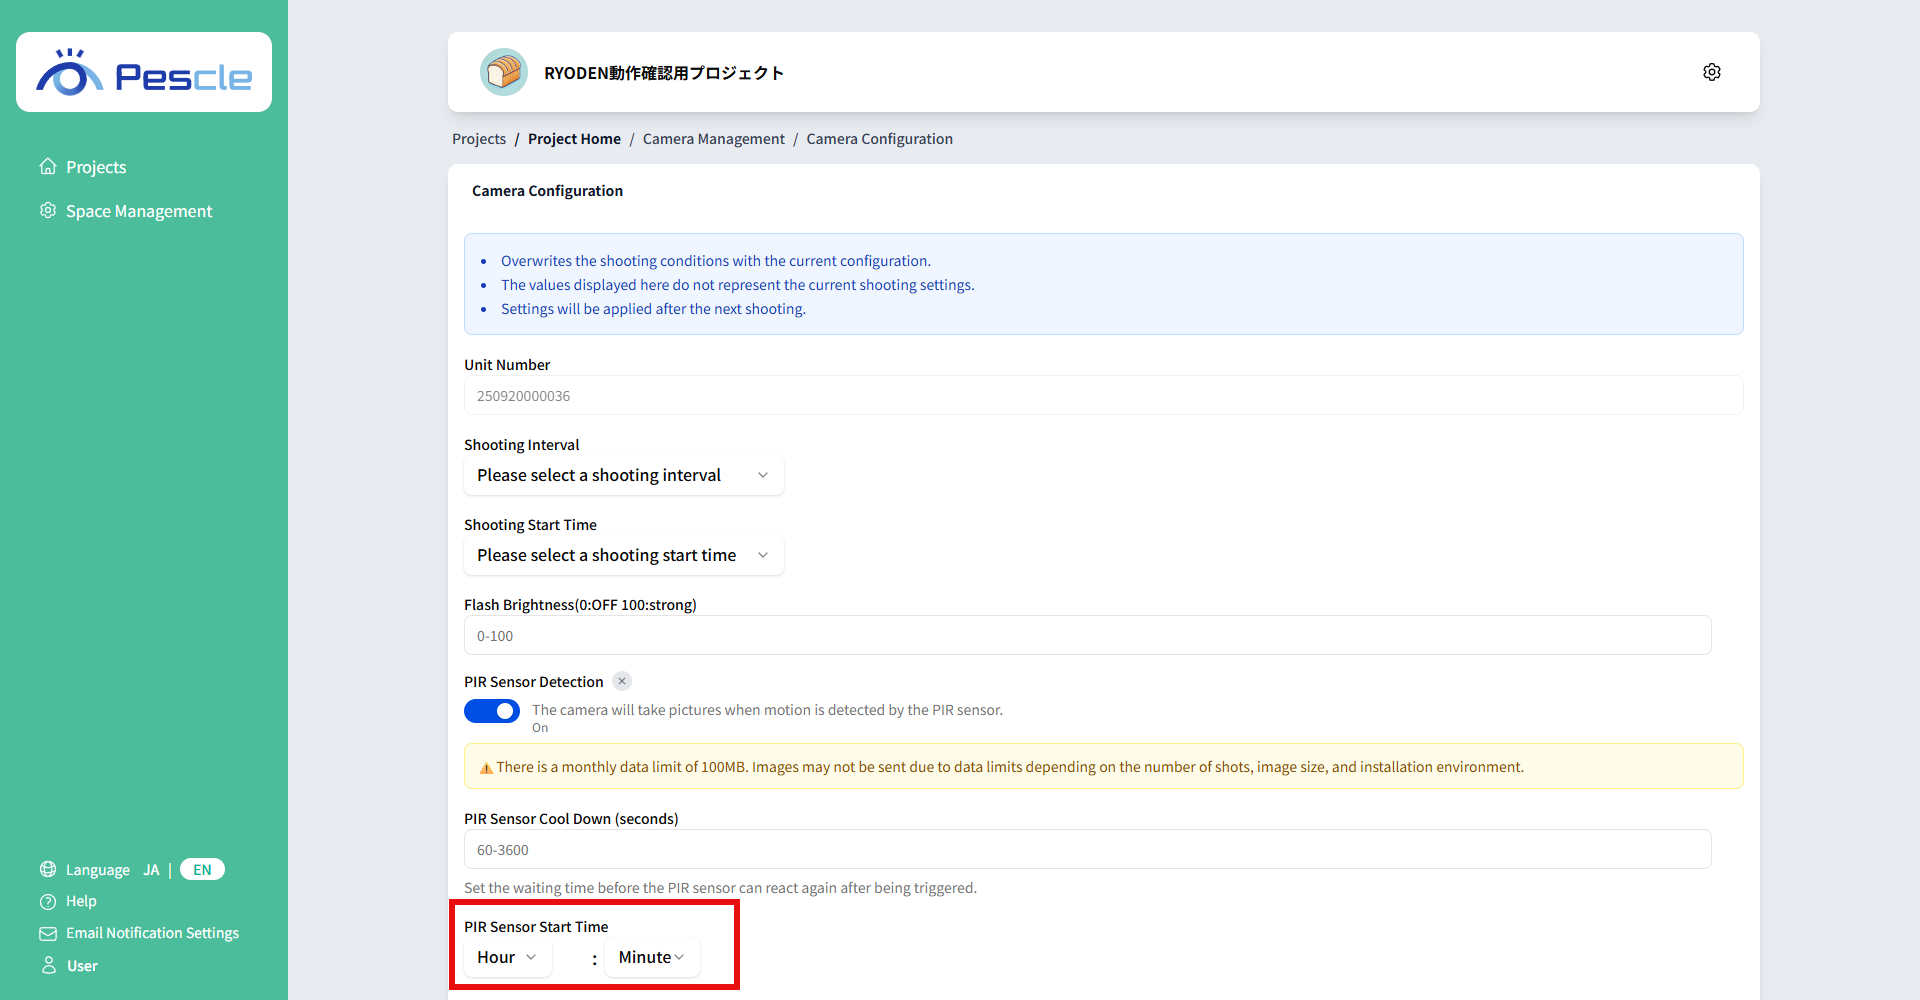
Setting the PIR sensor stop time
Select the PIR sensor stop time.