Preparing the Hardware
Explanation of the included items. Please confirm that you have the following items.
Part |
Description |
|---|---|
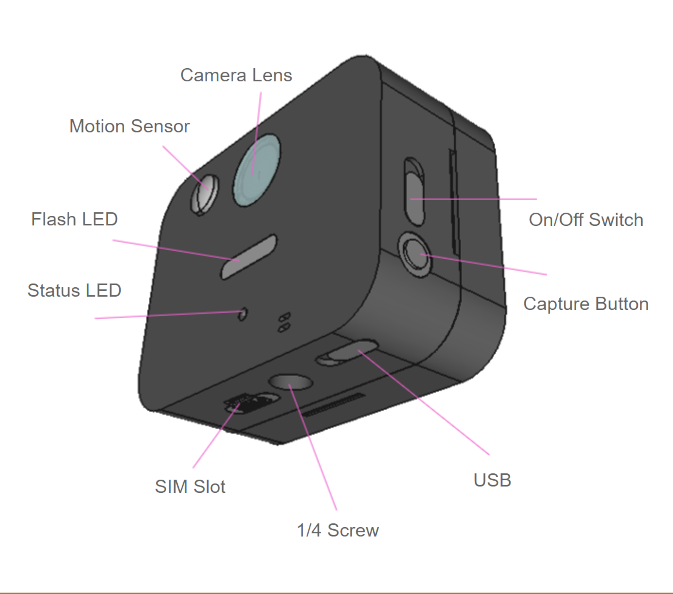
Camera Lens |
- |
Motion Sensor |
Detects moving objects and takes pictures. |
Flash LED |
Lights the flash during shooting. |
Status LED |
Displays the status of shooting and image transmission with an LED. |
SIM Slot |
The SIM provided by our company is inserted. The SIM provided in Japan is au. |
1/4 Screw |
Can attach tripods and clamps. |
USB |
Power can be supplied via USB. |
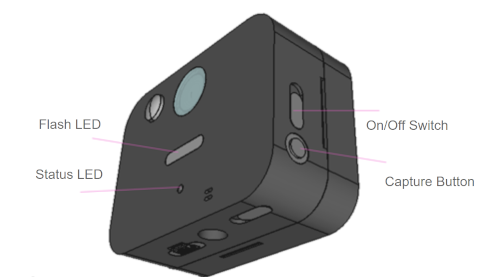
Shooting Button |
Press to forcefully take a picture. |
On/Off Switch |
Power on/off control. |
Equipment Preparation
For Battery Operation
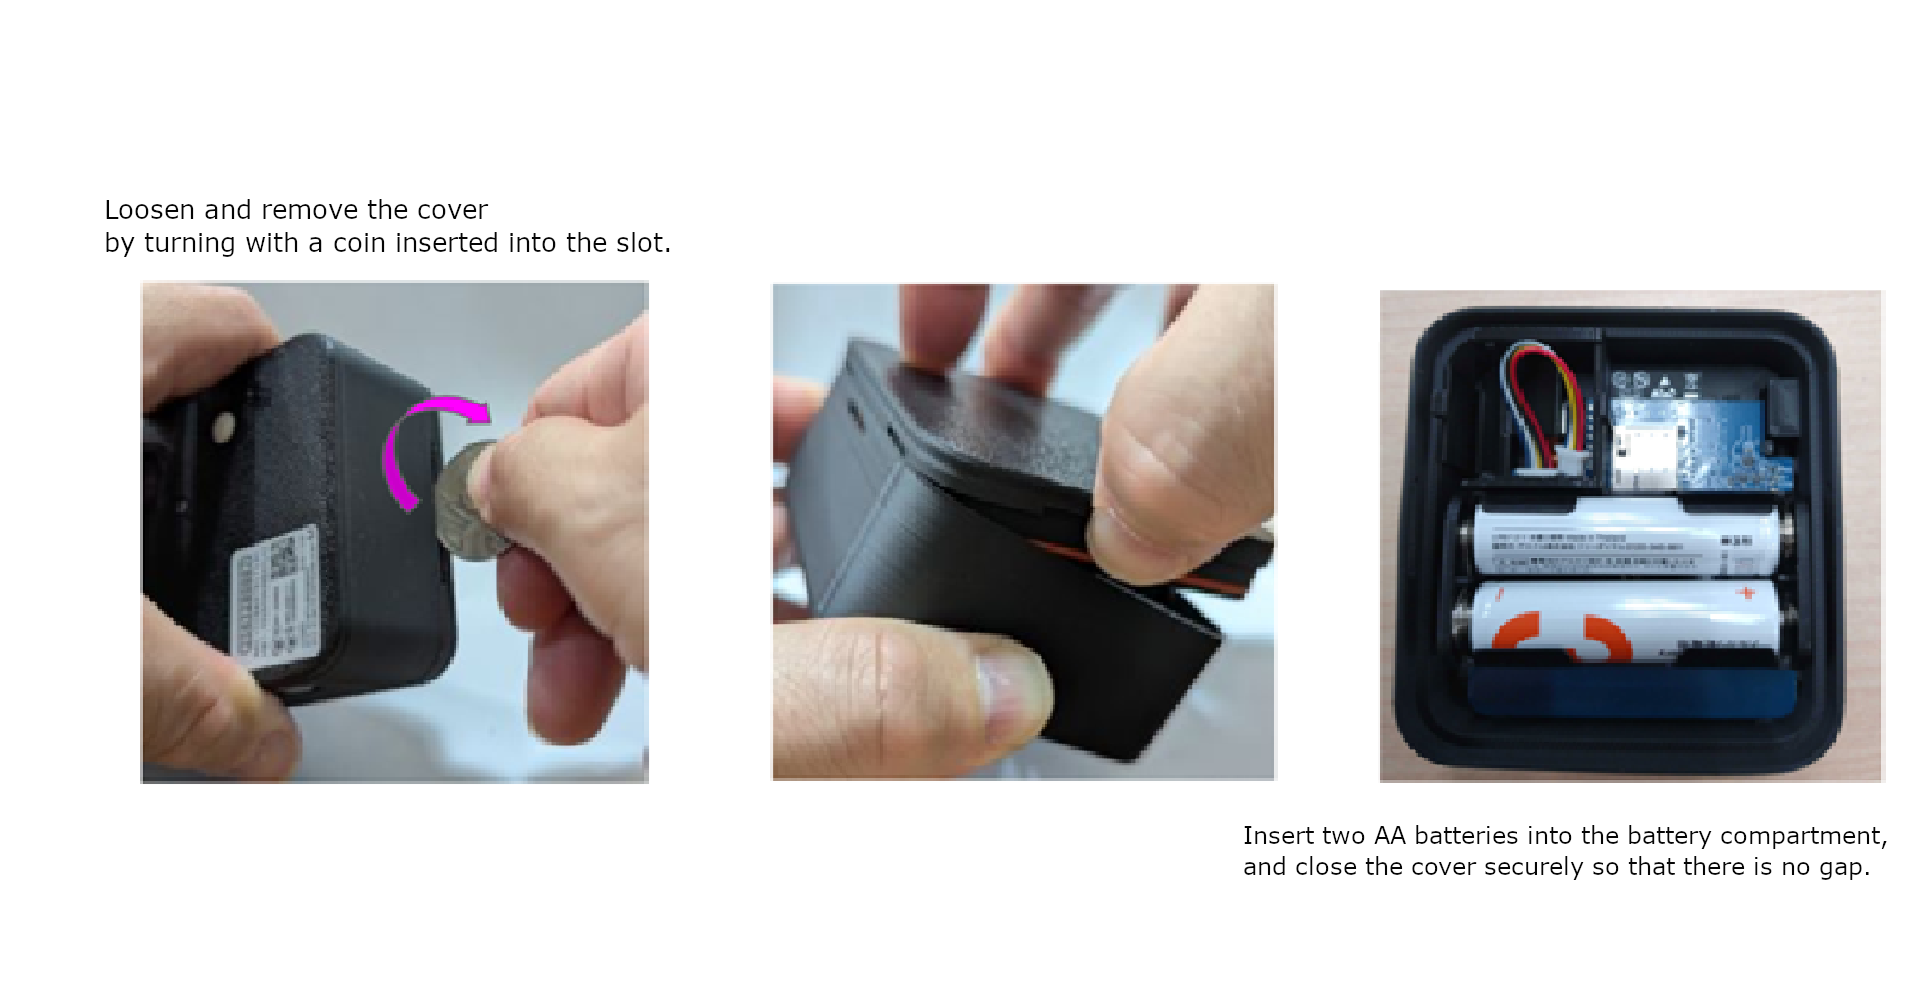
Please prepare two AA batteries.
Please install the batteries according to the diagram below.
Caution
Please be careful not to touch the circuit board on the back of the battery socket.
Please close the cover of this device tightly so that there are no gaps.
For USB Power Supply
Do not install batteries in this device.
Please turn off the power
Please connect the USB cable and perform a test shot.
Test shooting
Turn on the power with the On/Off switch.
Press the shooting button for about one second.
Release your hand after the status LED lights up orange.
The flash LED will light up within 30 seconds.
After the flash LED lights up, the green status LED will light up in about 5-10 seconds. If the red LED lights up, the transmission has failed, so please try steps 2-4 again in a place with better signal reception.
Once you can confirm the photo taken on the cloud screen, the preparation is complete.
Please install the camera in the place you want to monitor.
Caution
Do not press the shooting button twice in succession.
If the orange status LED does not light up even when you press the shooting button, the camera may already be taking a picture. Please wait about 30 seconds and press the button again.