How to Configure the Undetected Area
Caution
This feature is intended for project administrators.
An undetected area is a region of the camera image that is excluded from detection.
If you enclose a spot where unintended differences are repeatedly detected, such as the shadow of a pipe or a reflection of light, with a polygon, that region is excluded from detection.
The undetected area is configured for each camera, and you can register multiple areas for a single camera.
Warning
Depending on how the undetected area is configured, detection may not work as expected.
Please review your settings before saving.
How to Open the Undetected Area Settings Screen
You can access this from the project home screen by clicking the gear icon in the upper right corner.
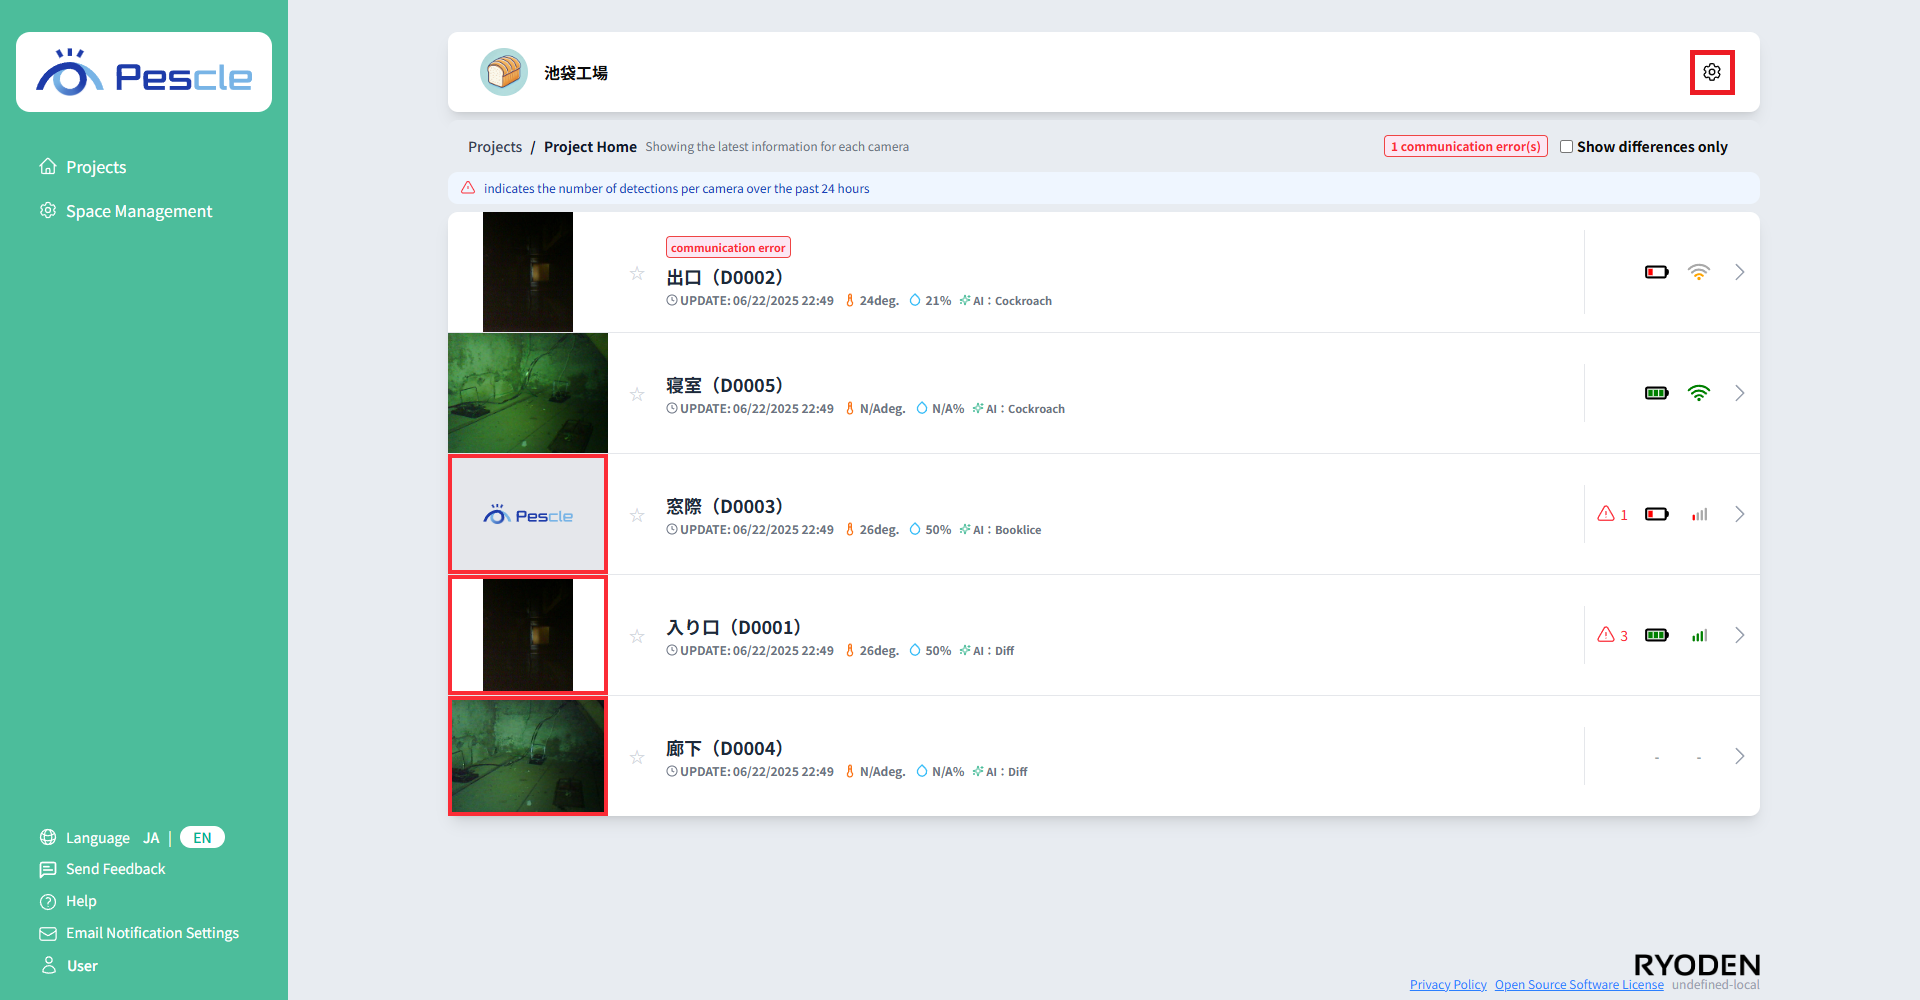
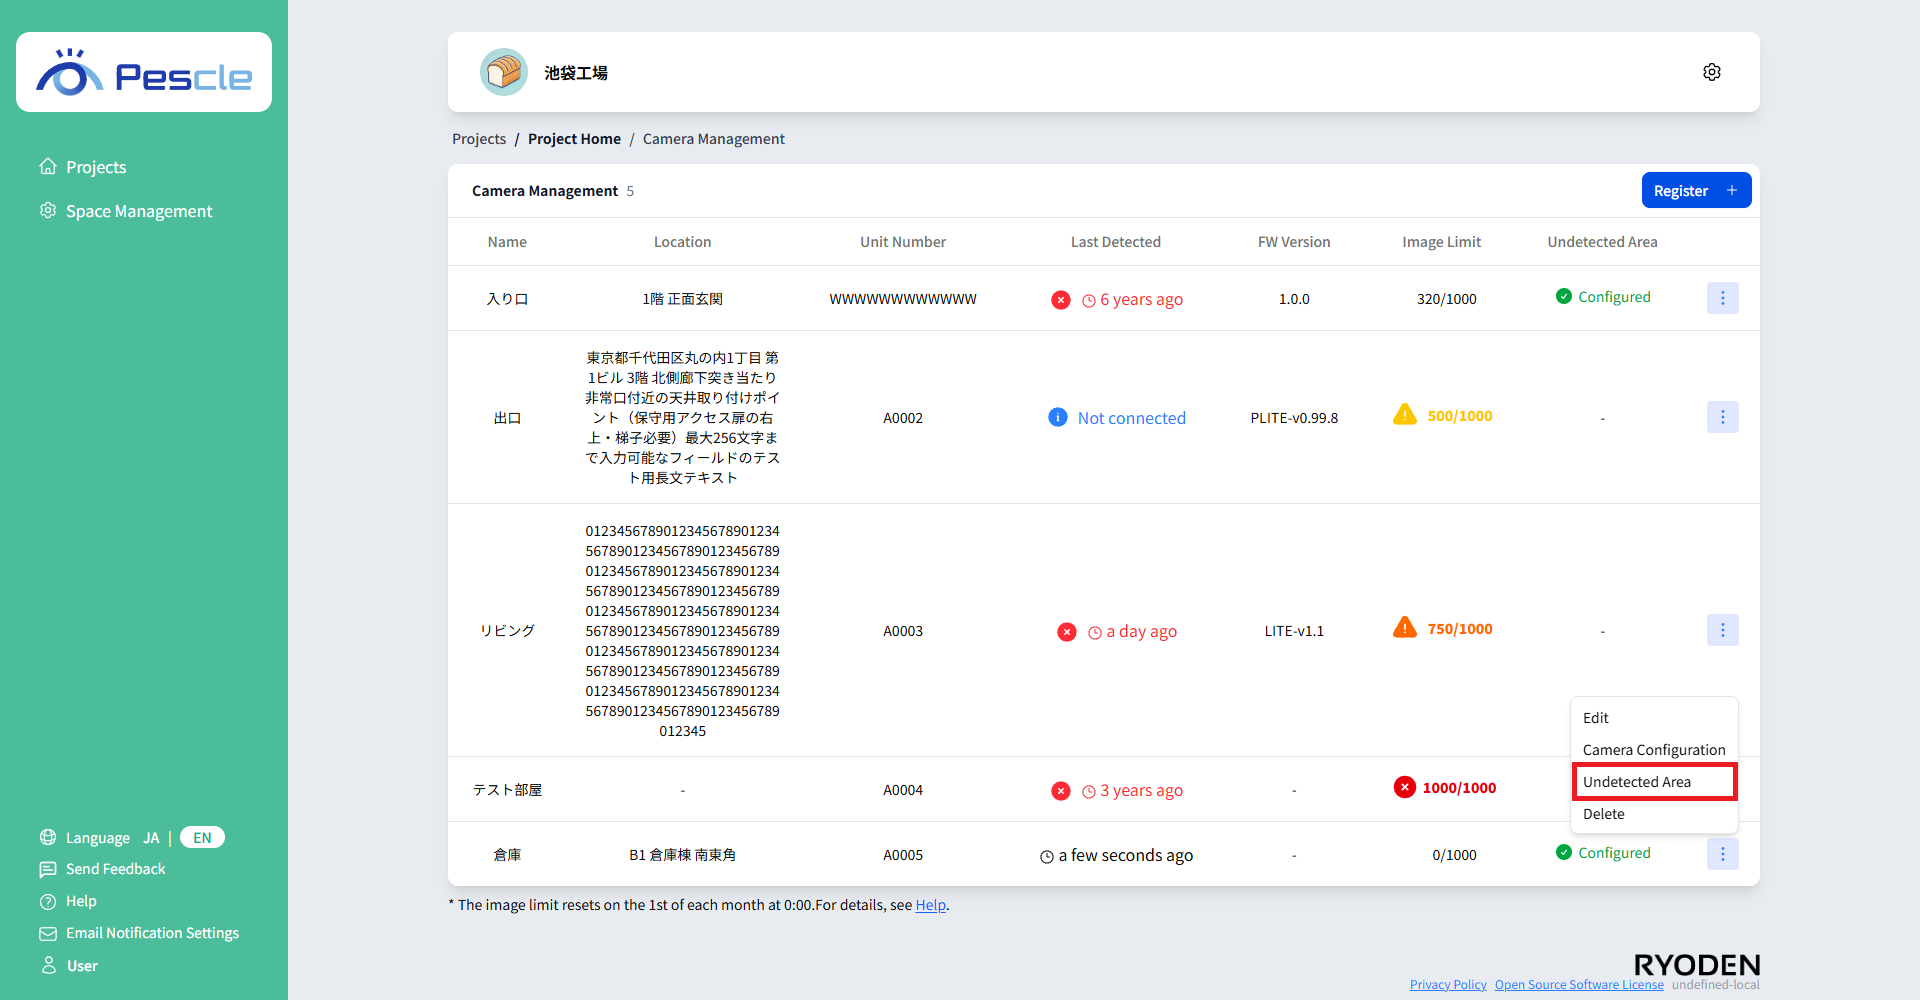
When the camera management screen appears, click the vertical ellipsis to the right of the camera you want to manage.
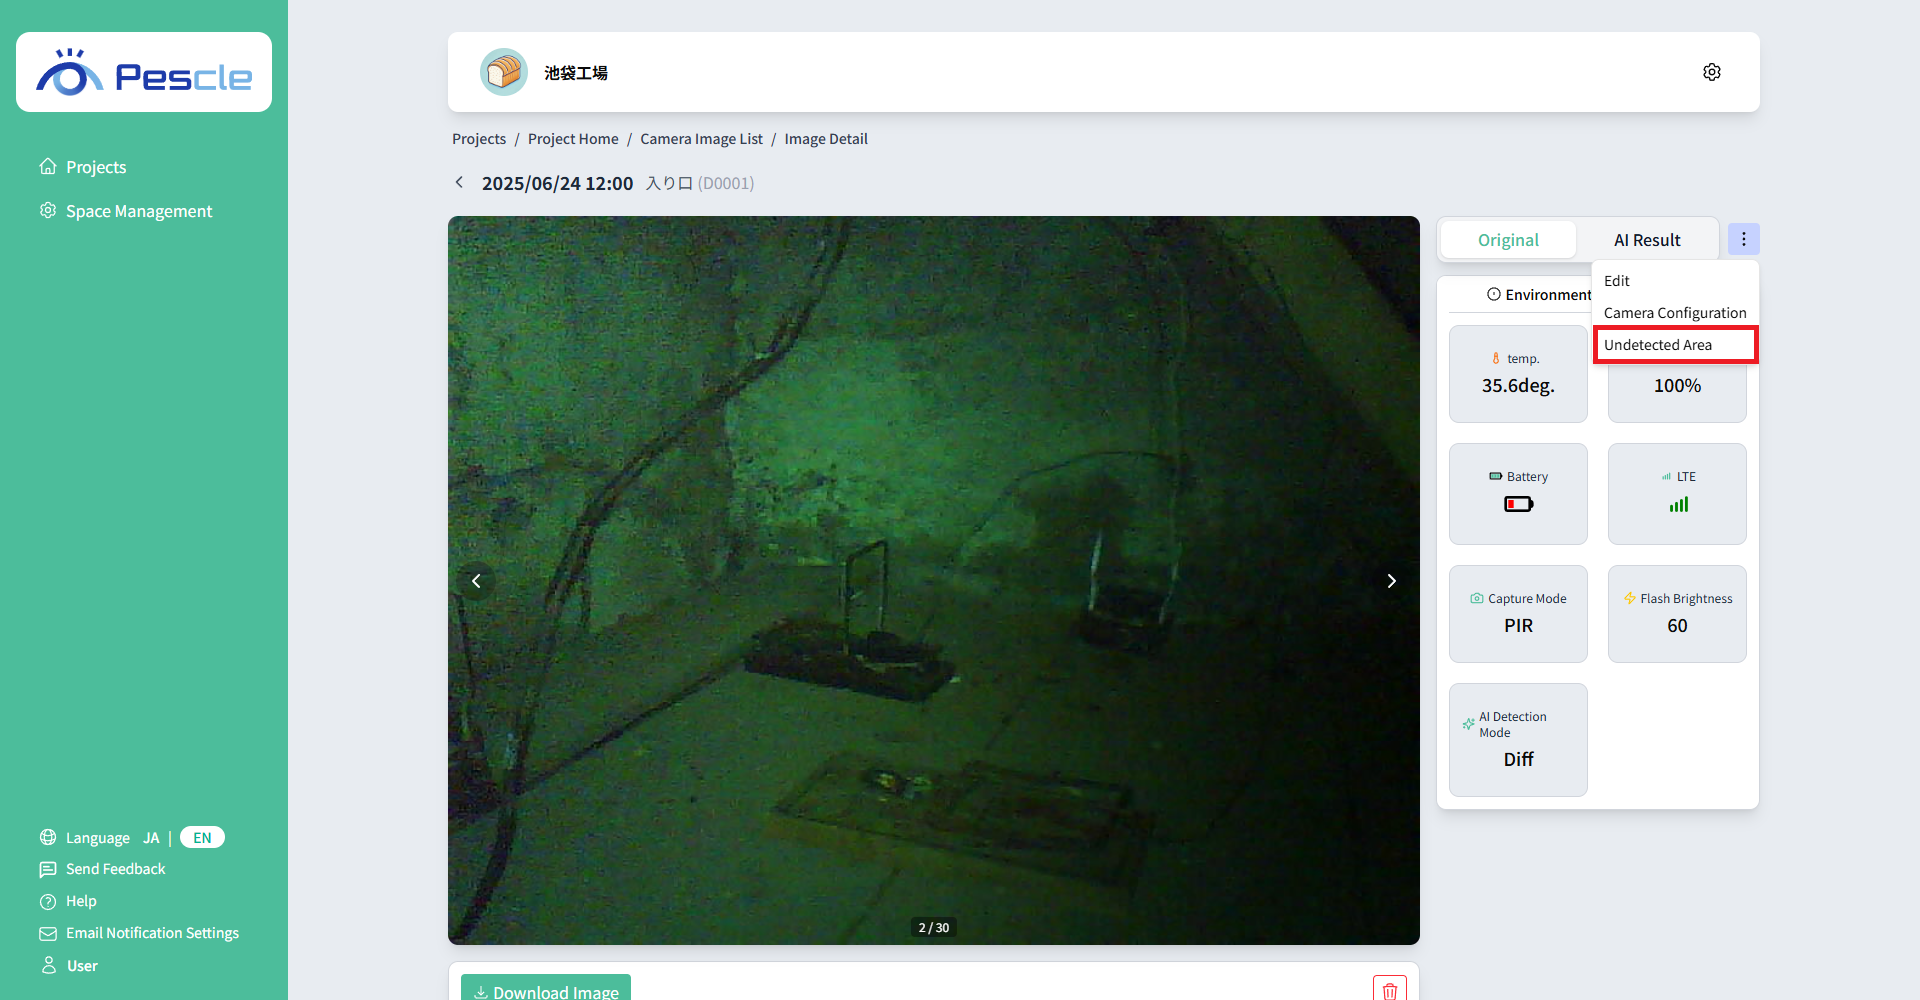
When the submenu appears, click “Undetected Area”.
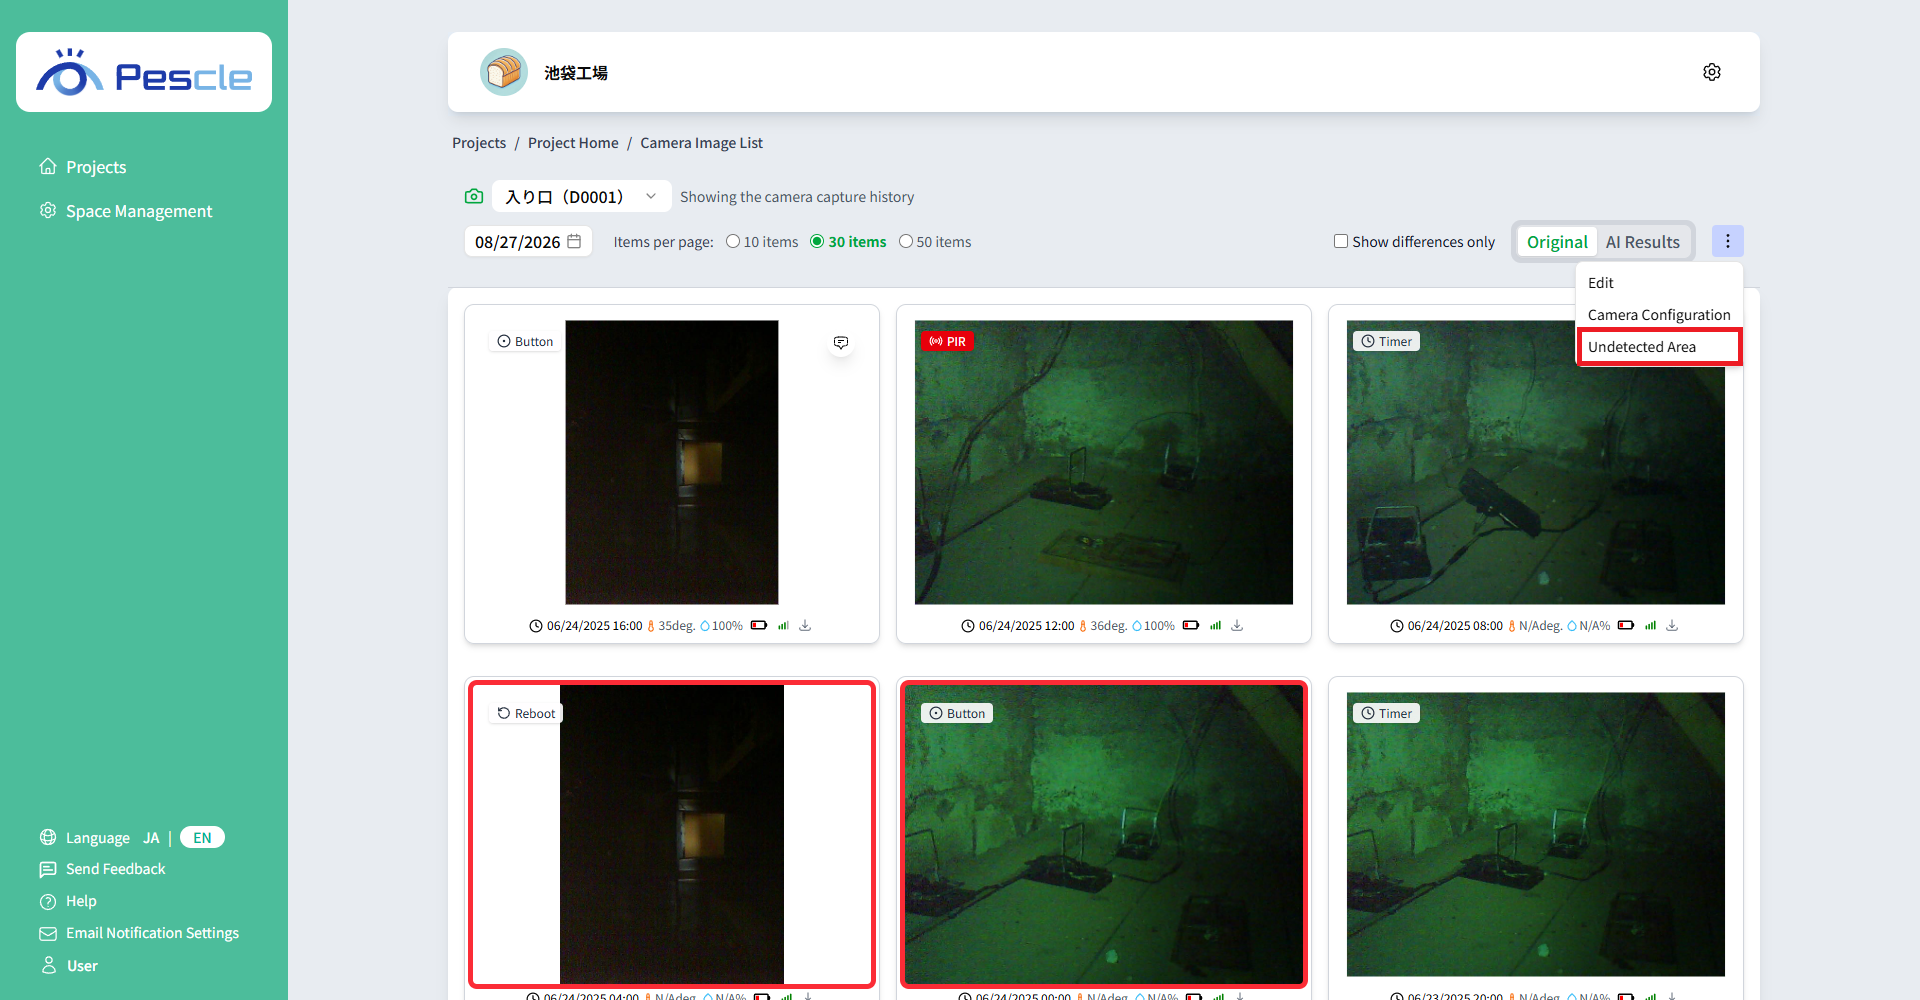
You can also open it from the vertical ellipsis in the top right corner of the camera image list page.
You can also open it from the vertical ellipsis in the top right corner of the image on the camera image detail page.
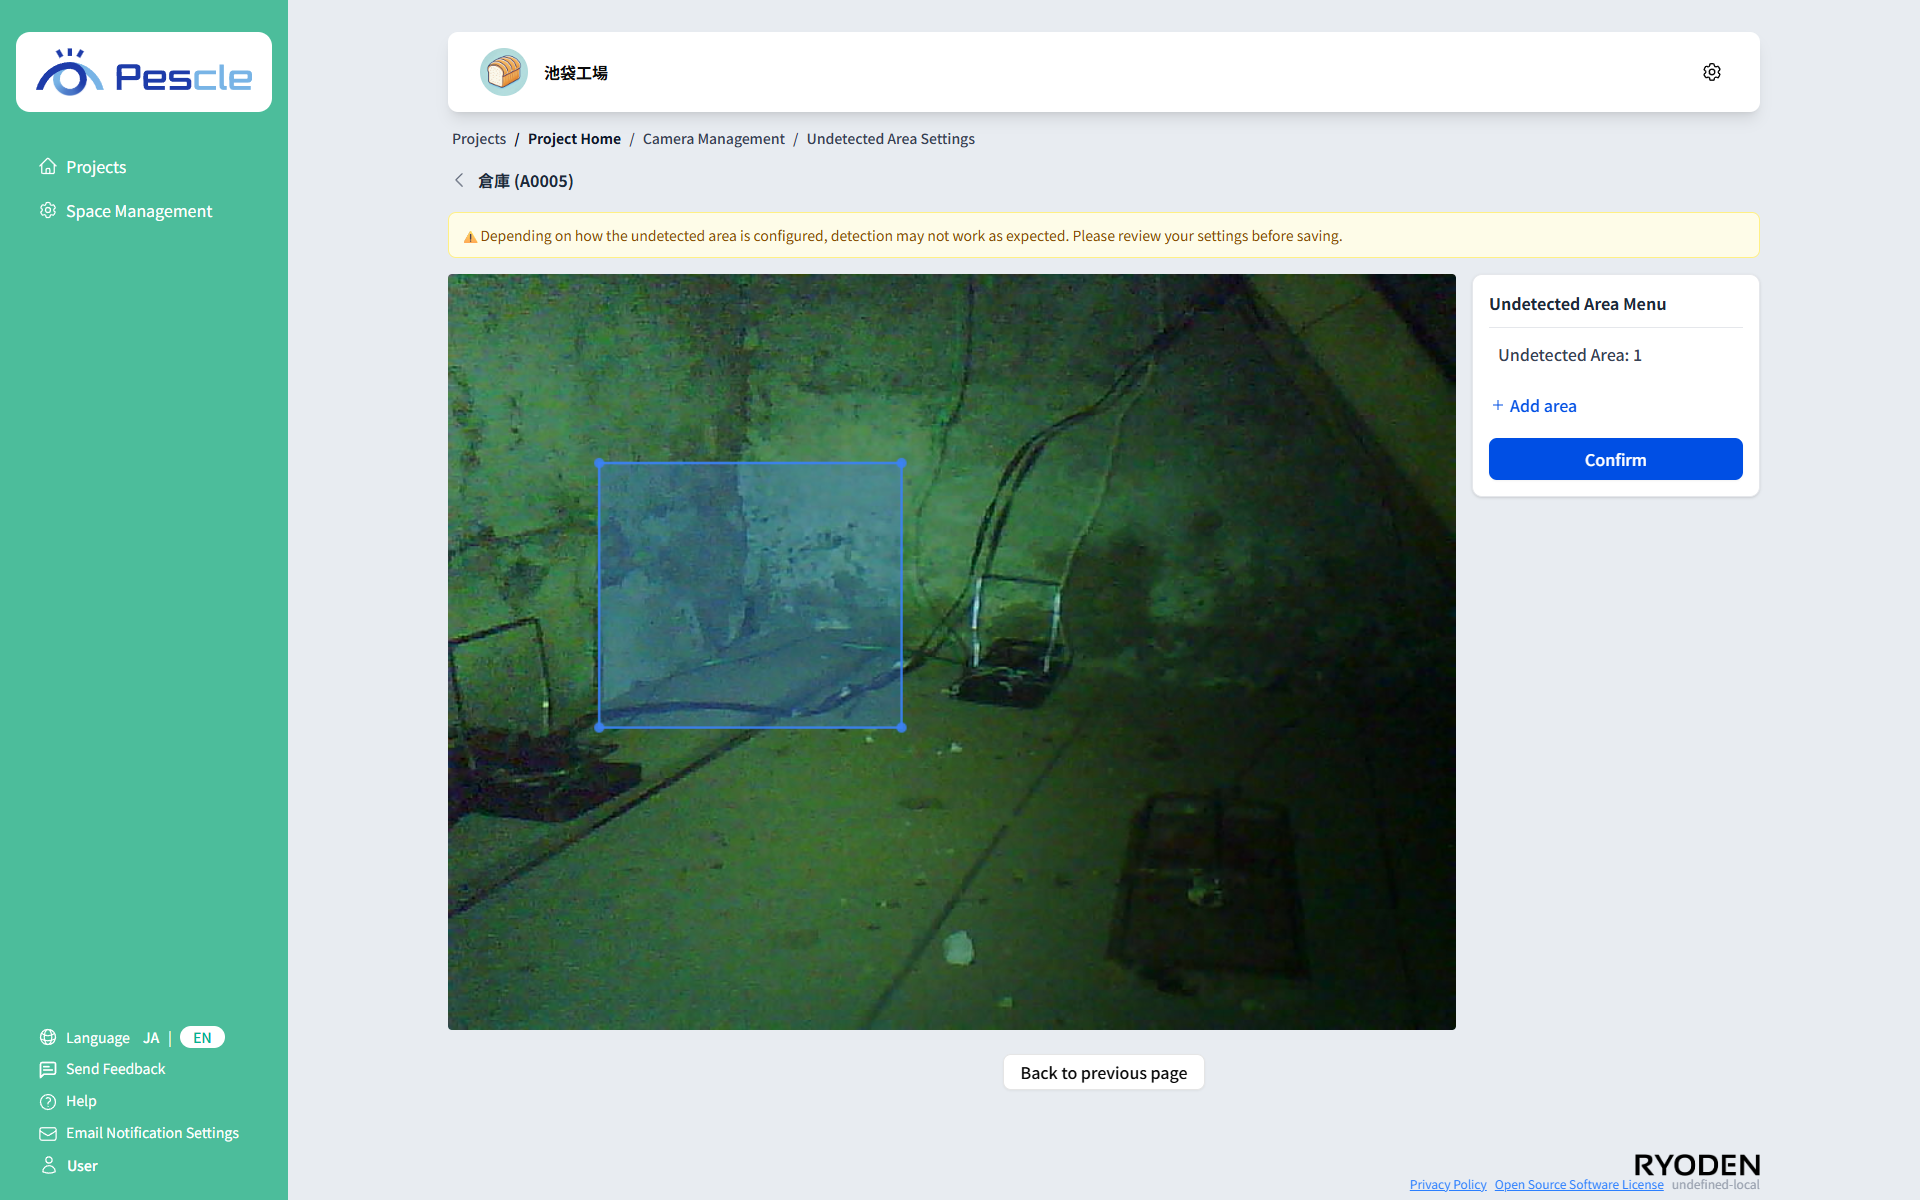
Undetected Area Settings Overview
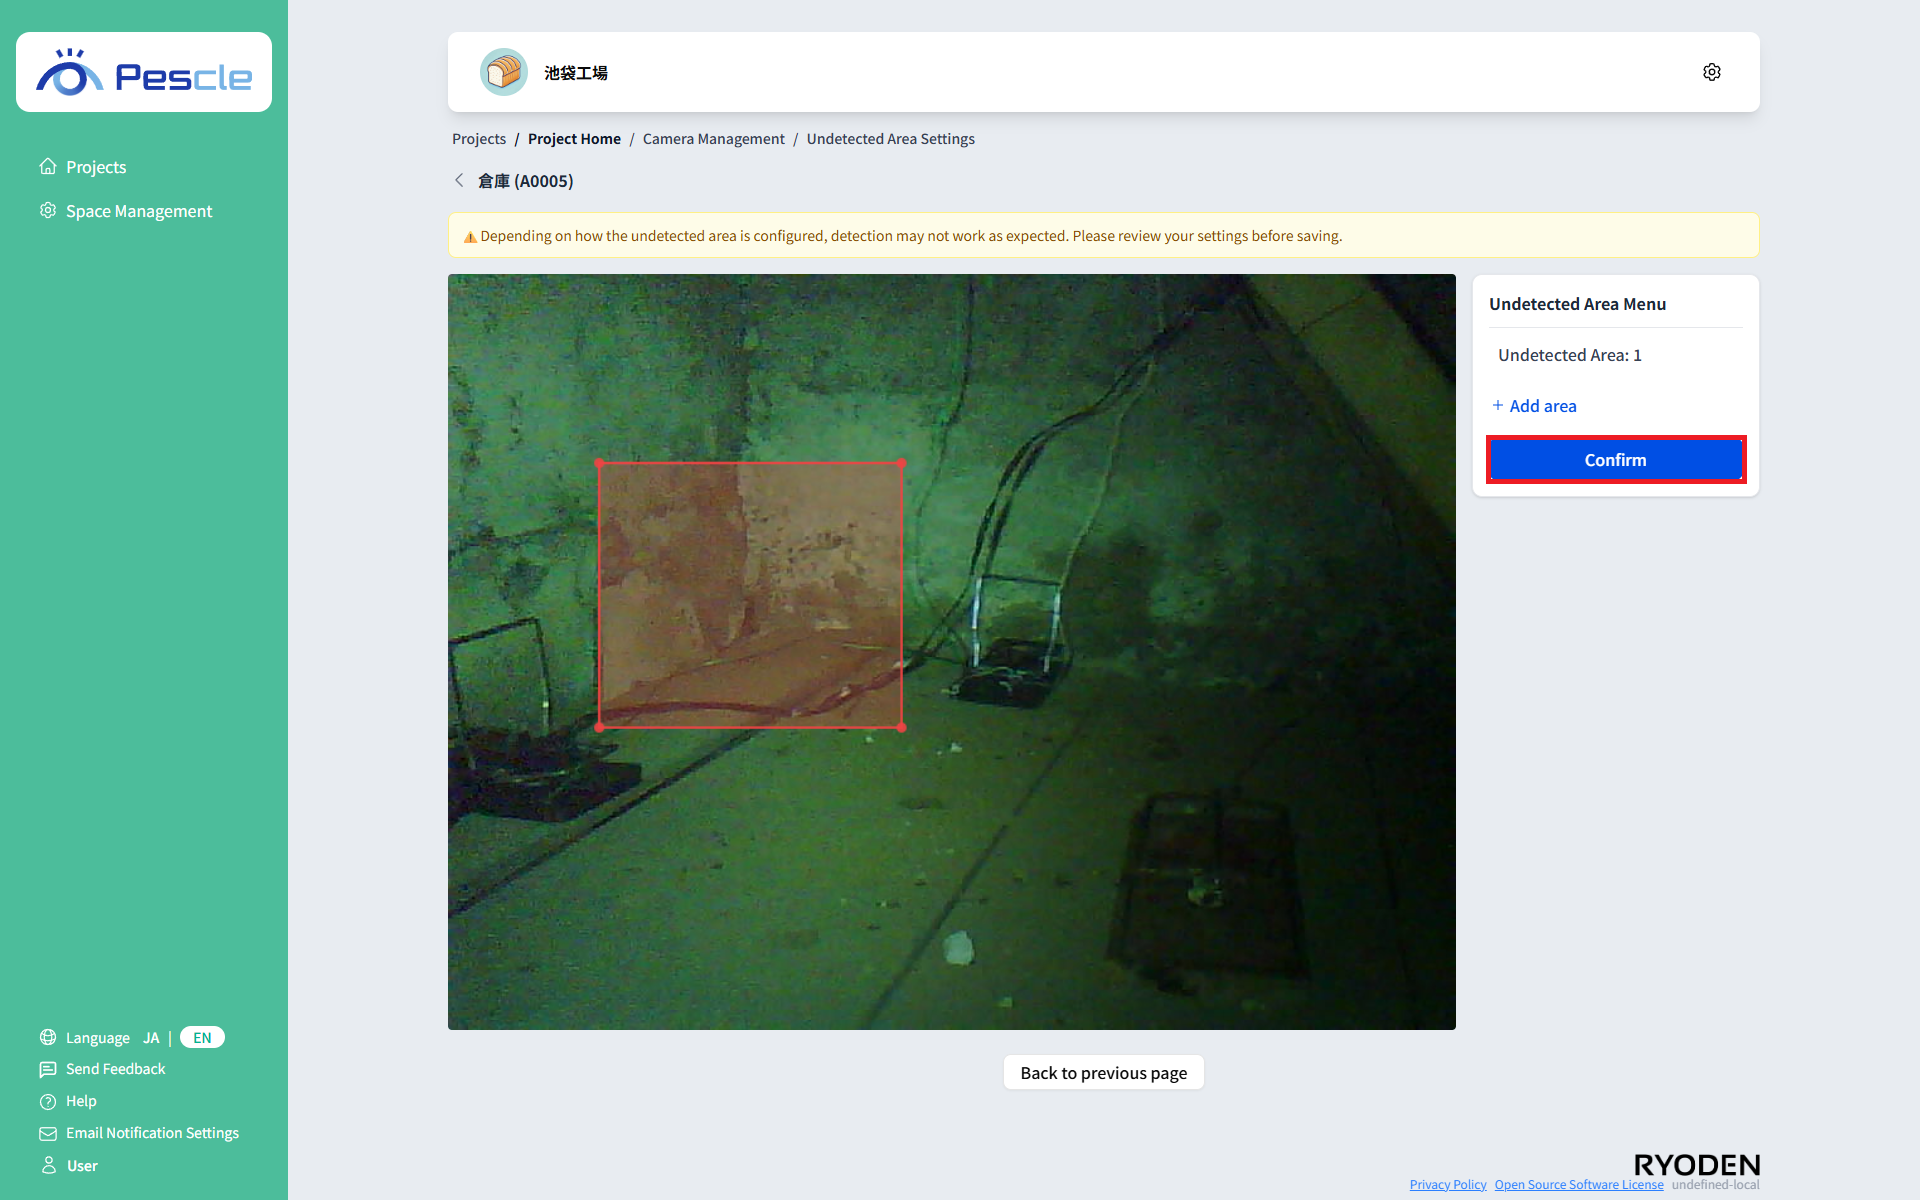
The latest image of the camera is displayed on the left, and the “Undetected Area Menu” is displayed on the right.
Registered areas are listed in the menu as “Undetected Area: 1” and so on, and are drawn on the image as blue polygons.
Note
If the latest image is not available, the message “The undetected area cannot be configured because the latest image is not available.” is displayed and areas cannot be configured.
This applies when the camera has not taken any image yet, or when the latest image has been deleted. You can configure areas once the camera sends its next image.
How to Add an Area
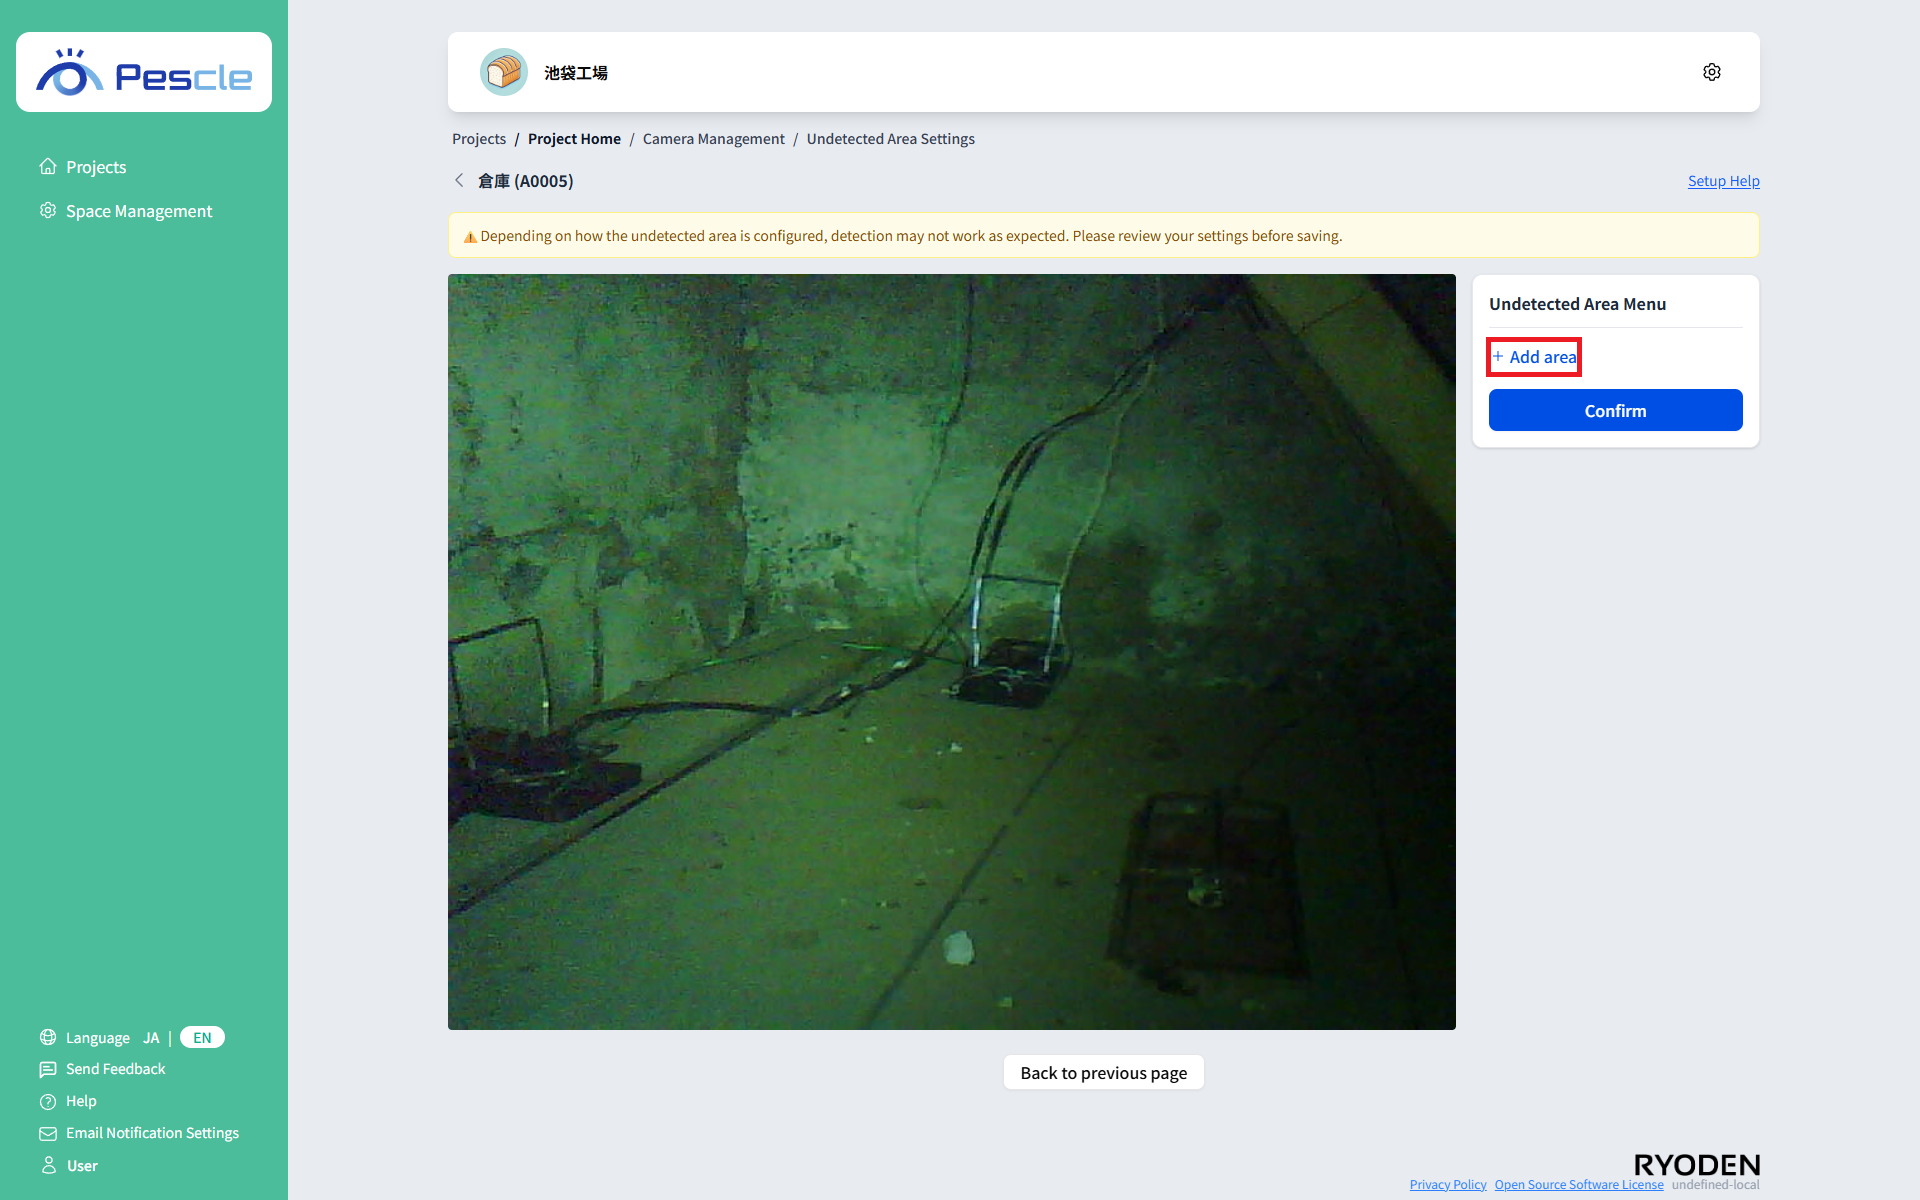
Click “Add area”.
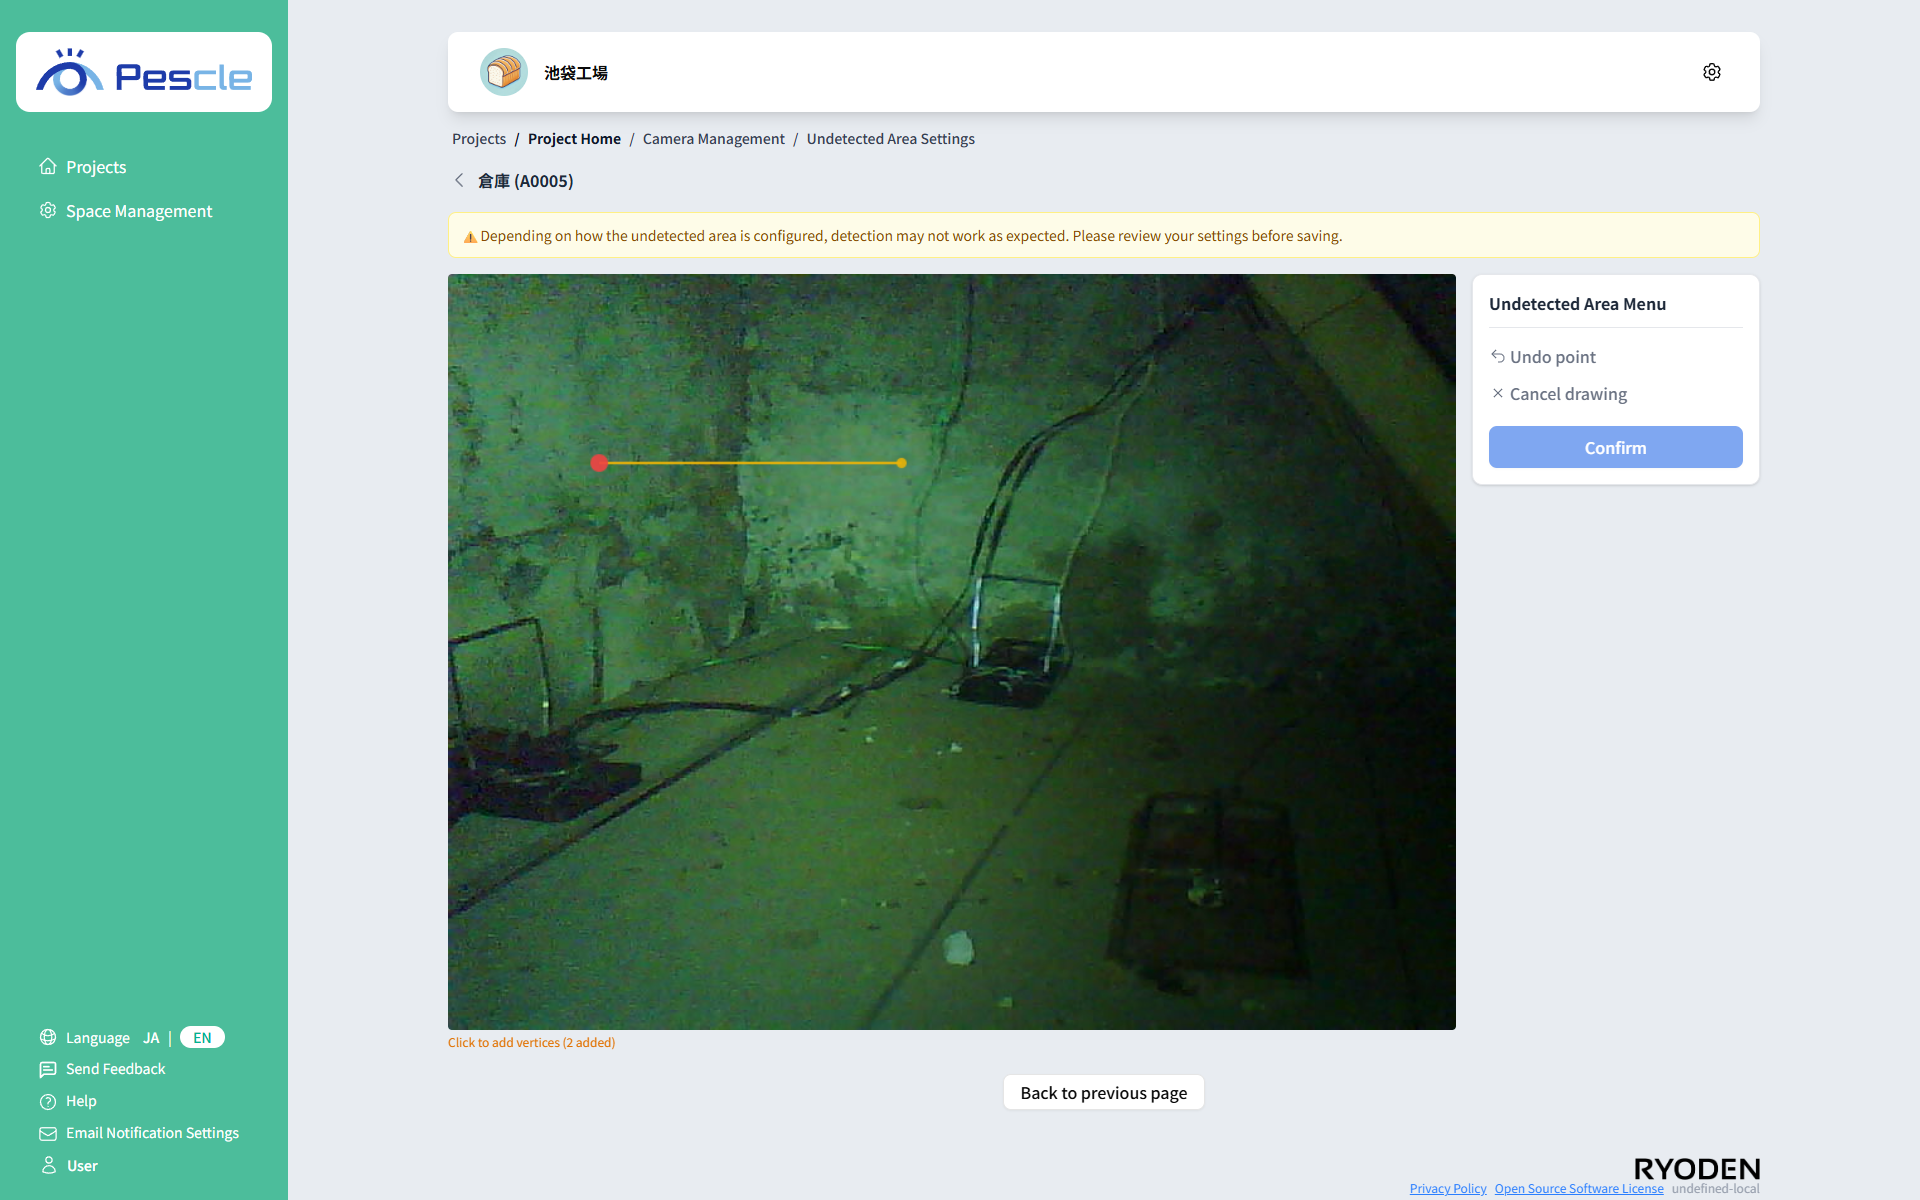
Click on the image to add the corners (vertices) of the region you want to enclose, one at a time.
Vertices are numbered in the order you click them. If you click near the edge of the image, the vertex is automatically snapped to the edge of the image.
Once three or more vertices have been added, the first vertex is shown as a red circle with a white border. Click this circle to close the polygon and register it as an area.
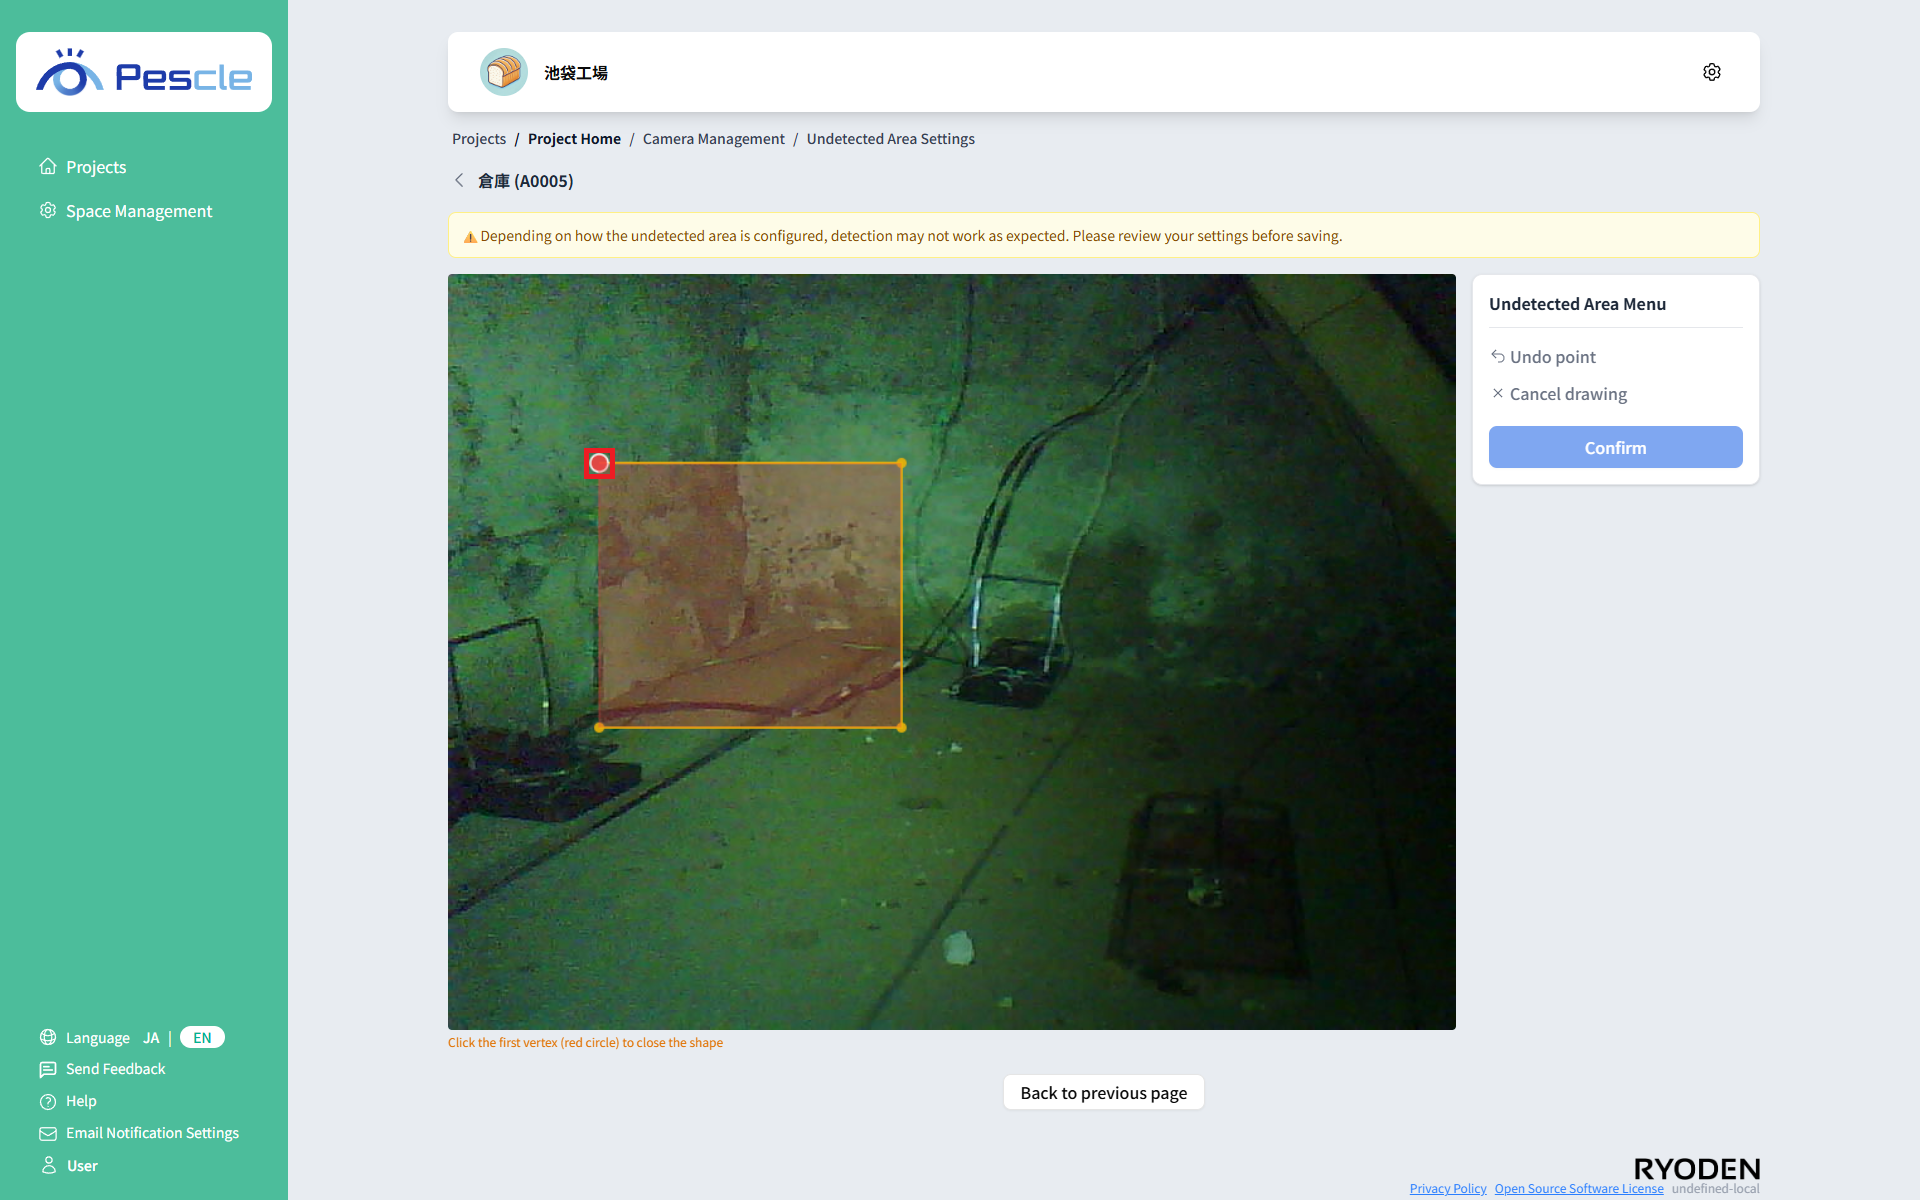
While adding vertices, the following operations are available.
“Undo point”: Cancels the vertex you added last.
“Cancel drawing”: Discards all the vertices you are adding and exits the drawing mode.
Tip
An area is displayed in red immediately after it is registered. Once you save it with “Confirm”, it is displayed in blue the next time you open the screen.
Area Shapes That Cannot Be Created
You cannot add a vertex or close a polygon at a position where the line would cross a line that has already been drawn.
When you point at a position that cannot be used, the preview turns purple and the message “Cannot move or add a point here because it crosses an existing line” is displayed. Click another position, or cancel the vertex with “Undo point” and draw it again.
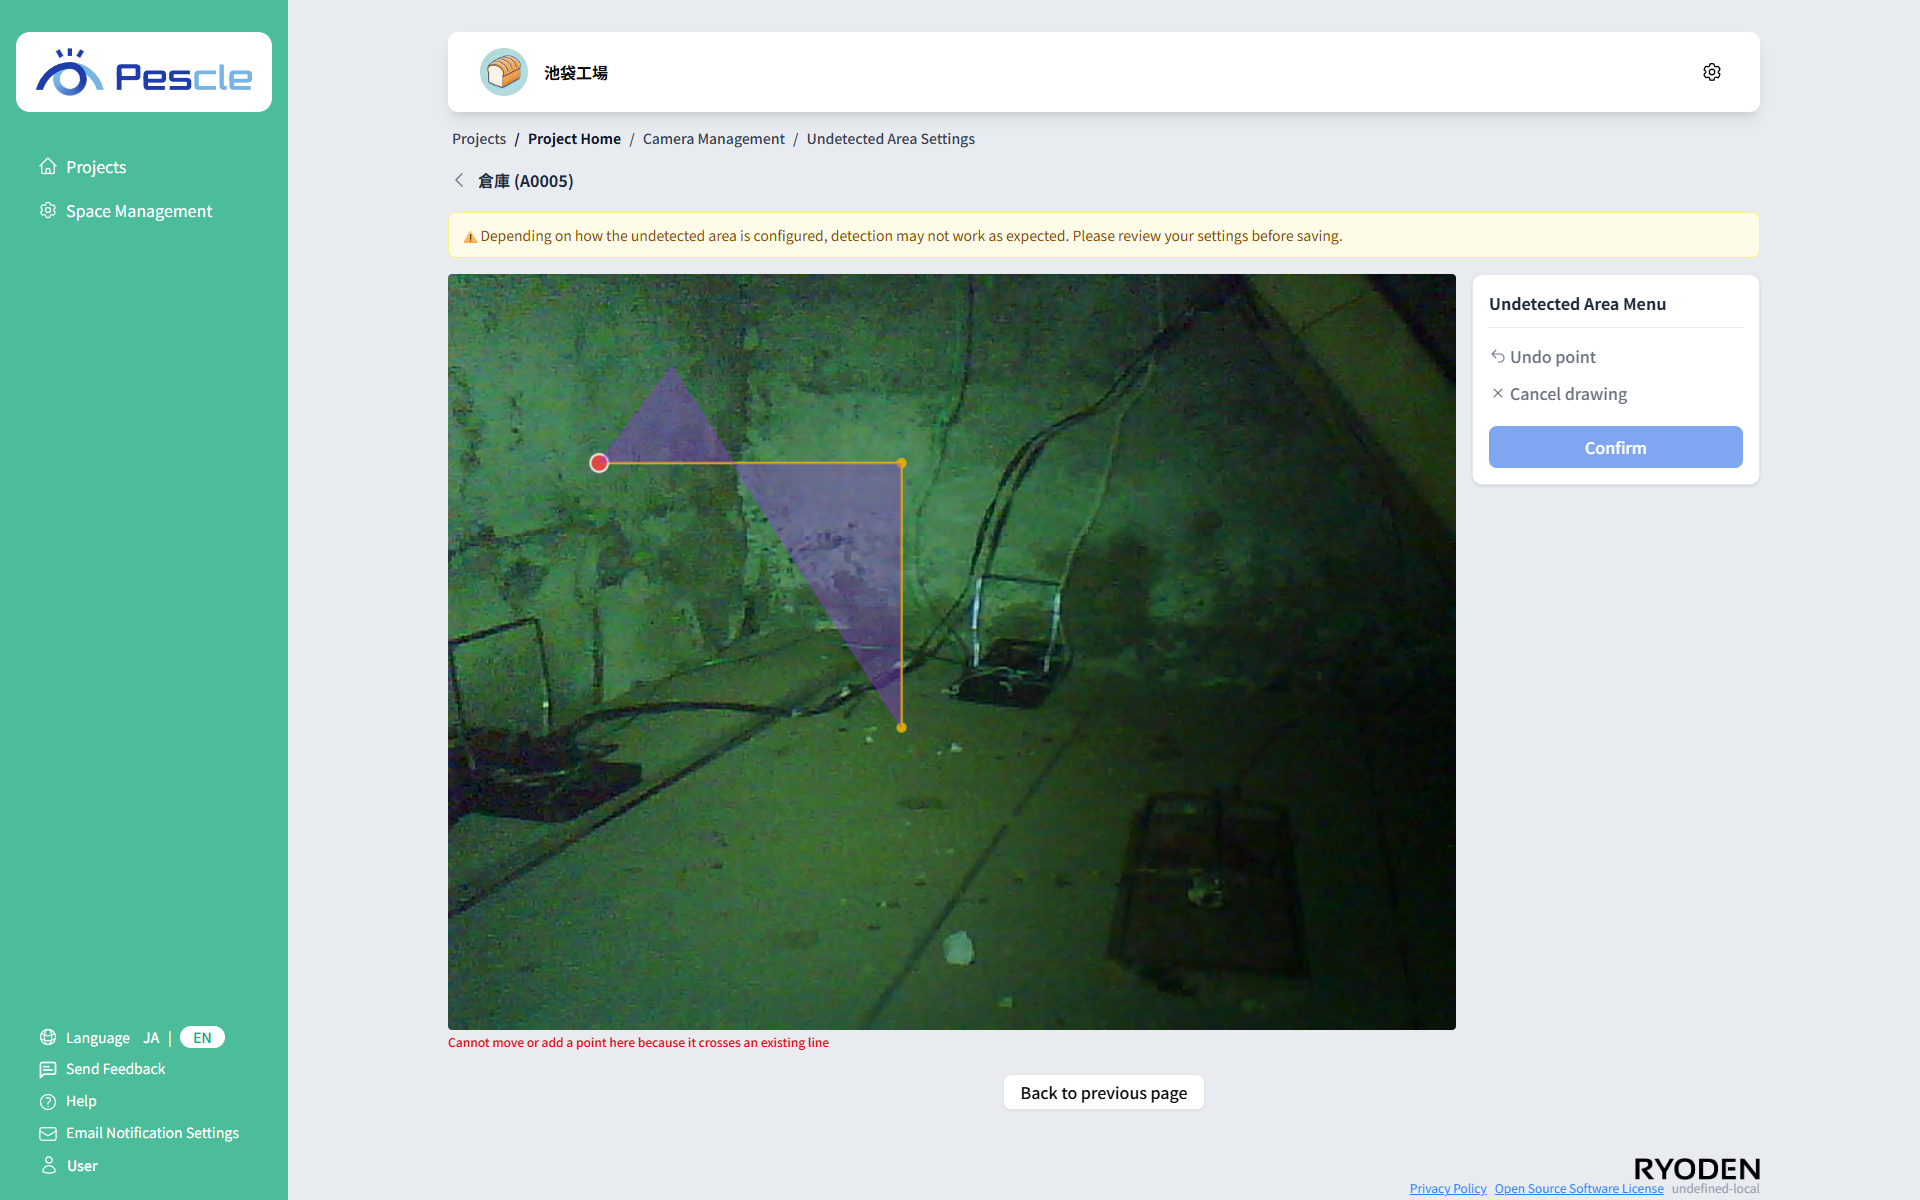
Note
Concave polygons can be created. Only shapes whose edges overlap each other cannot be created.
How to Change the Shape of an Area
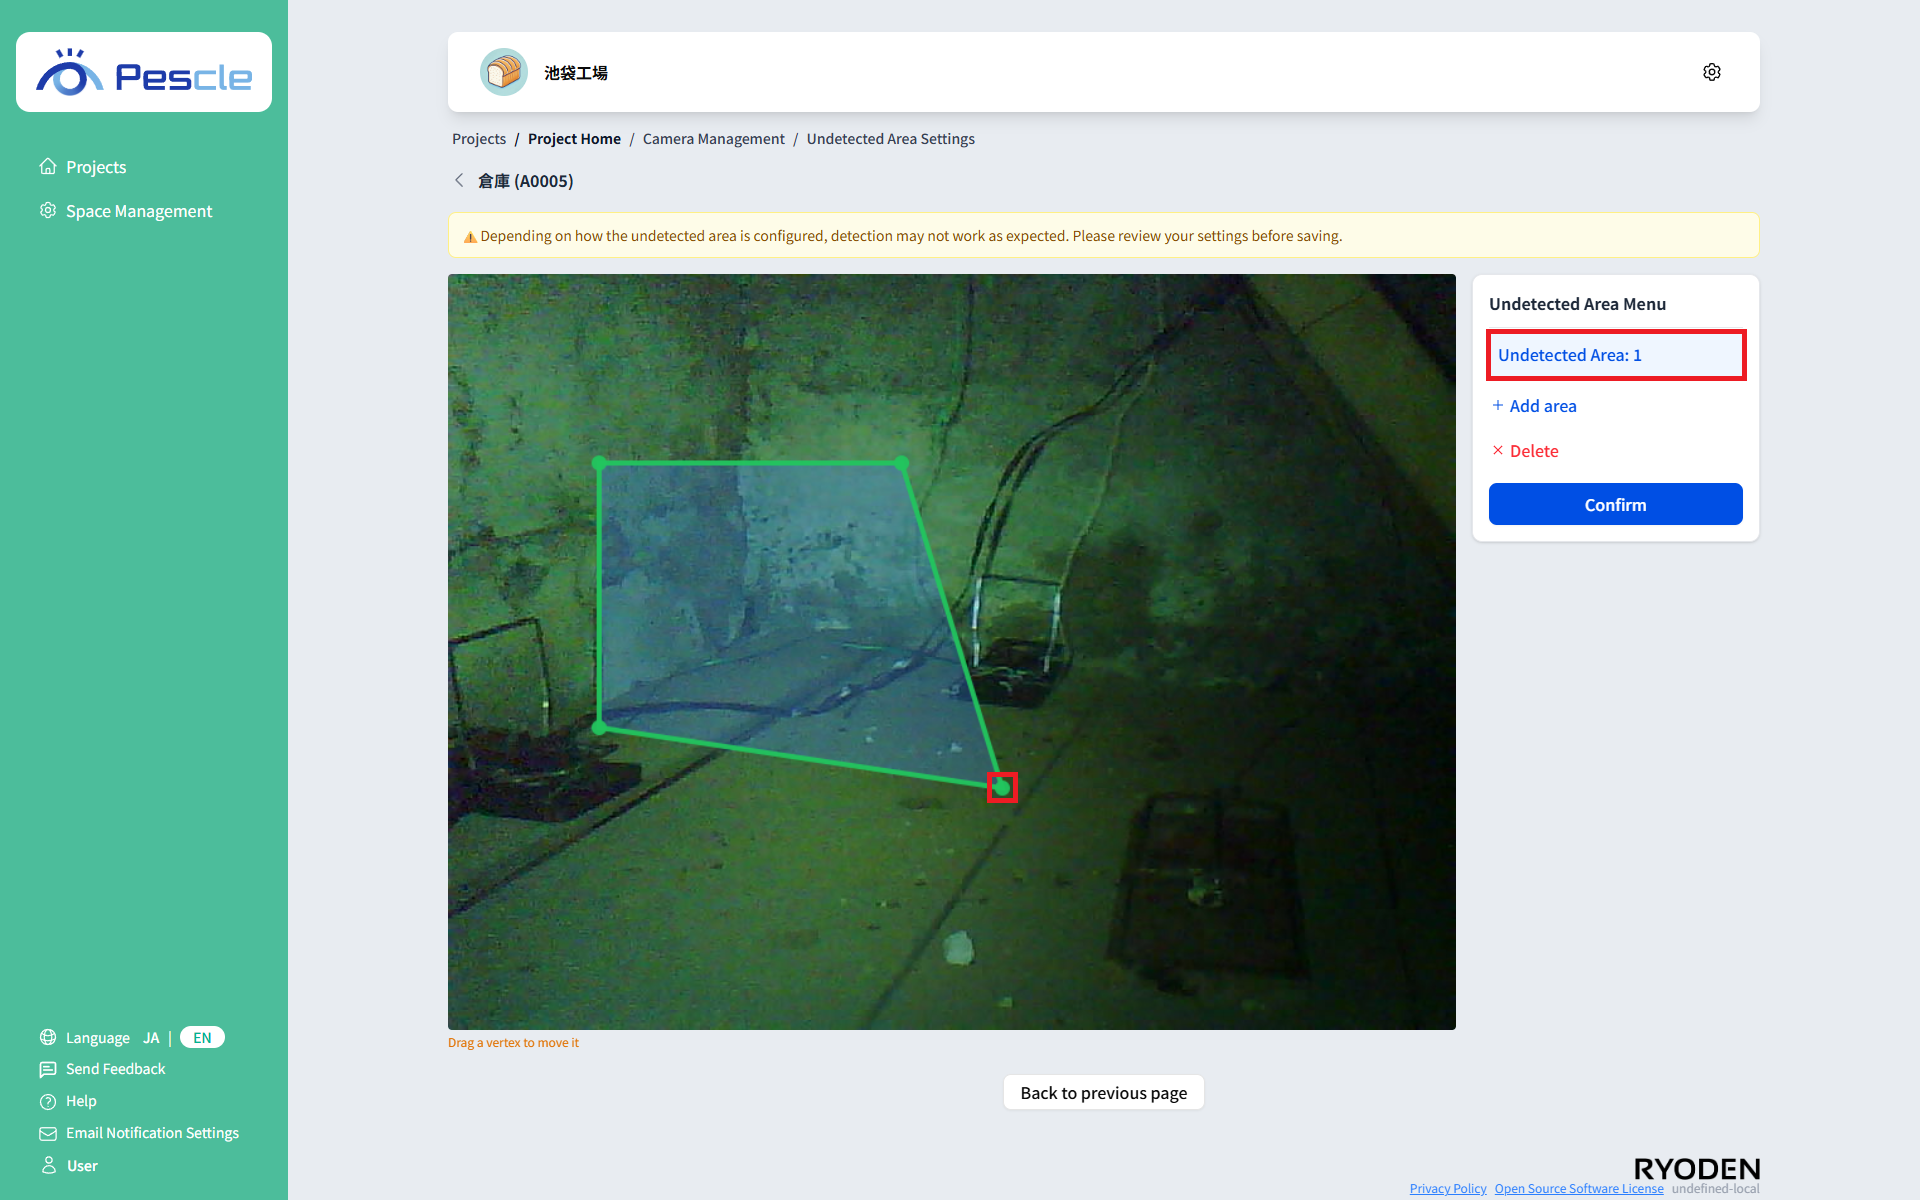
When you click the target area in the area list in the menu, that area is displayed with a thick green outline.
In this state, you can drag a vertex to move it and adjust the shape of the area.
How to Delete an Area
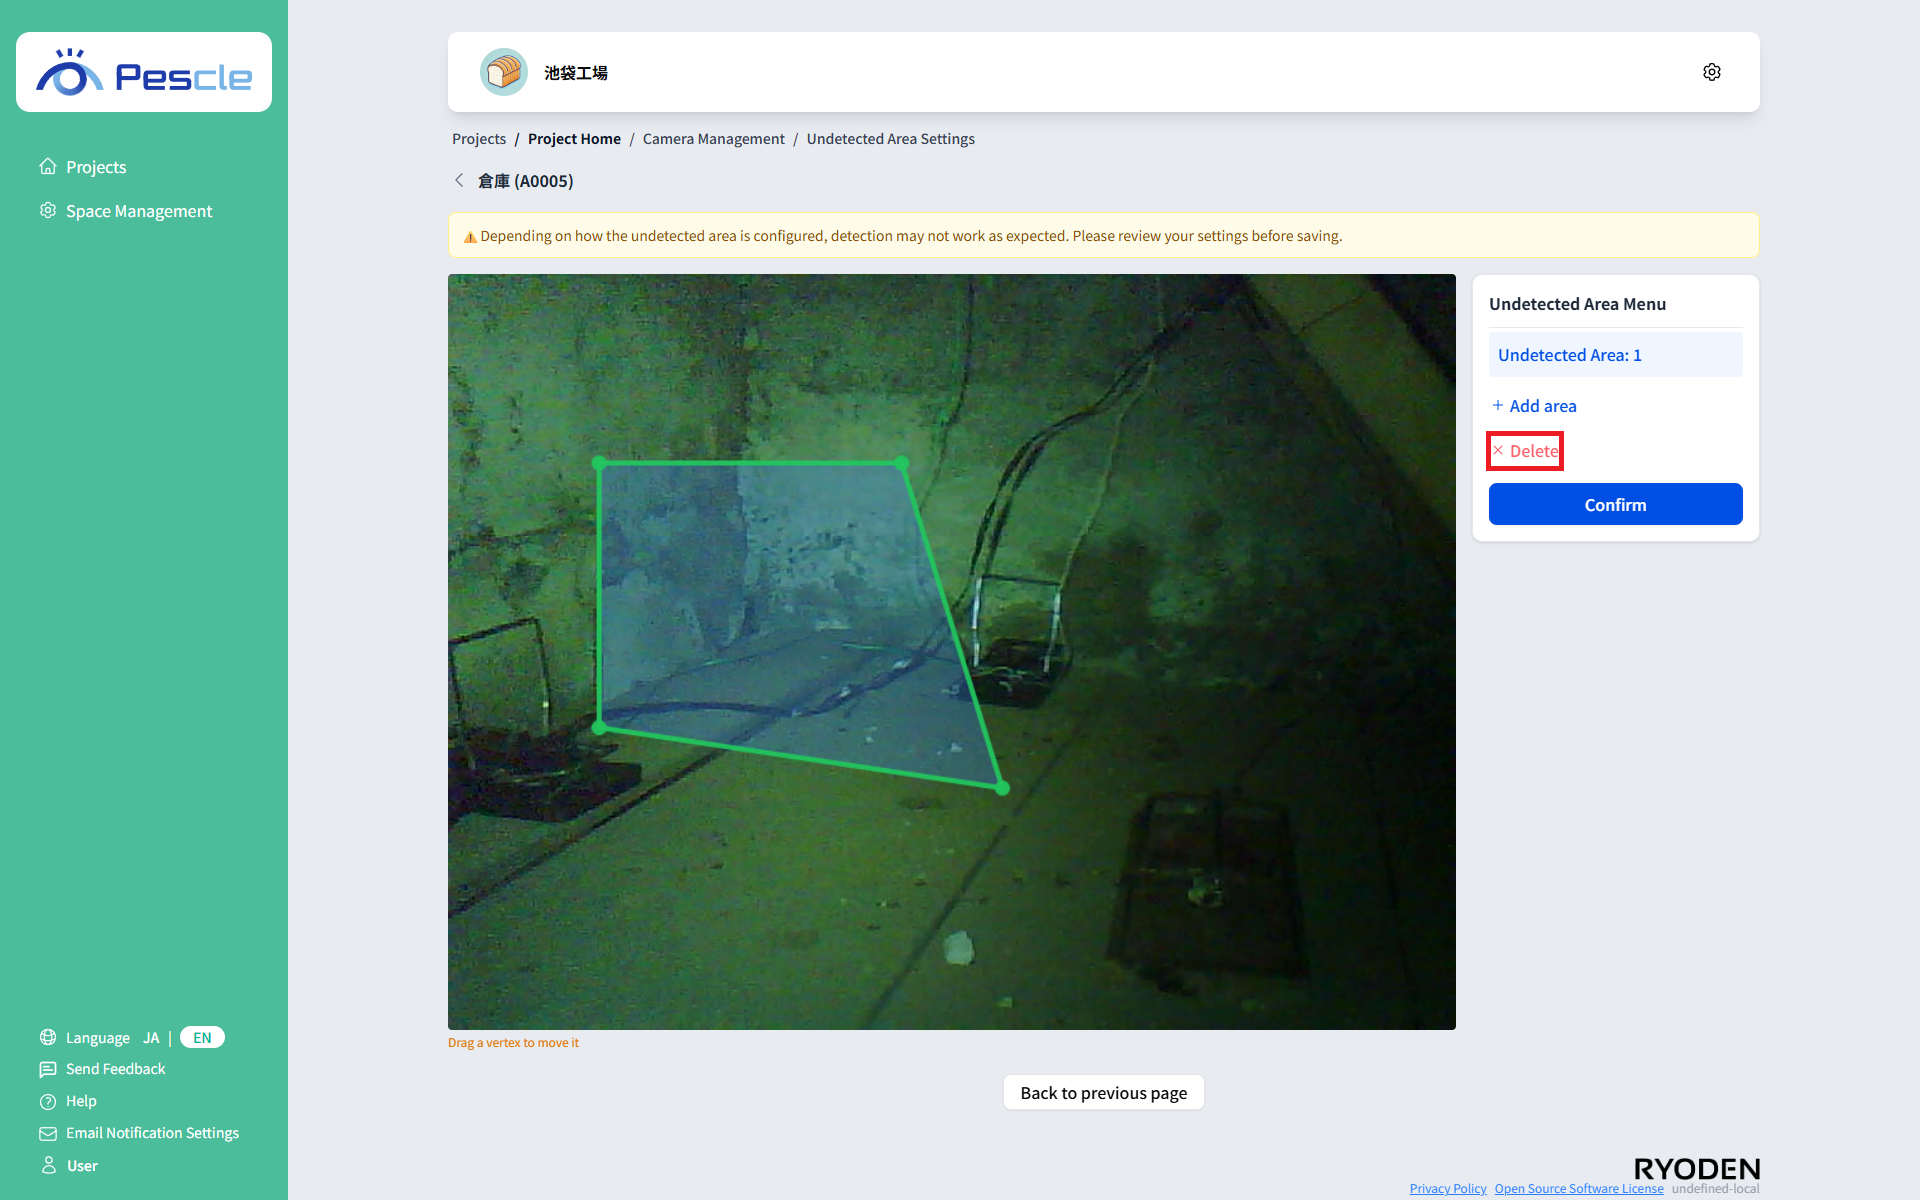
Click the target area in the area list in the menu to select it, then click “Delete”.
How to Save the Settings
When you have finished adding, editing, and deleting areas, click the “Confirm” button.
When saving is complete, you are returned to the previous page.
Caution
If you leave the screen without clicking “Confirm”, the areas you have added, edited, or deleted are not saved.
How to Check Which Cameras Are Configured
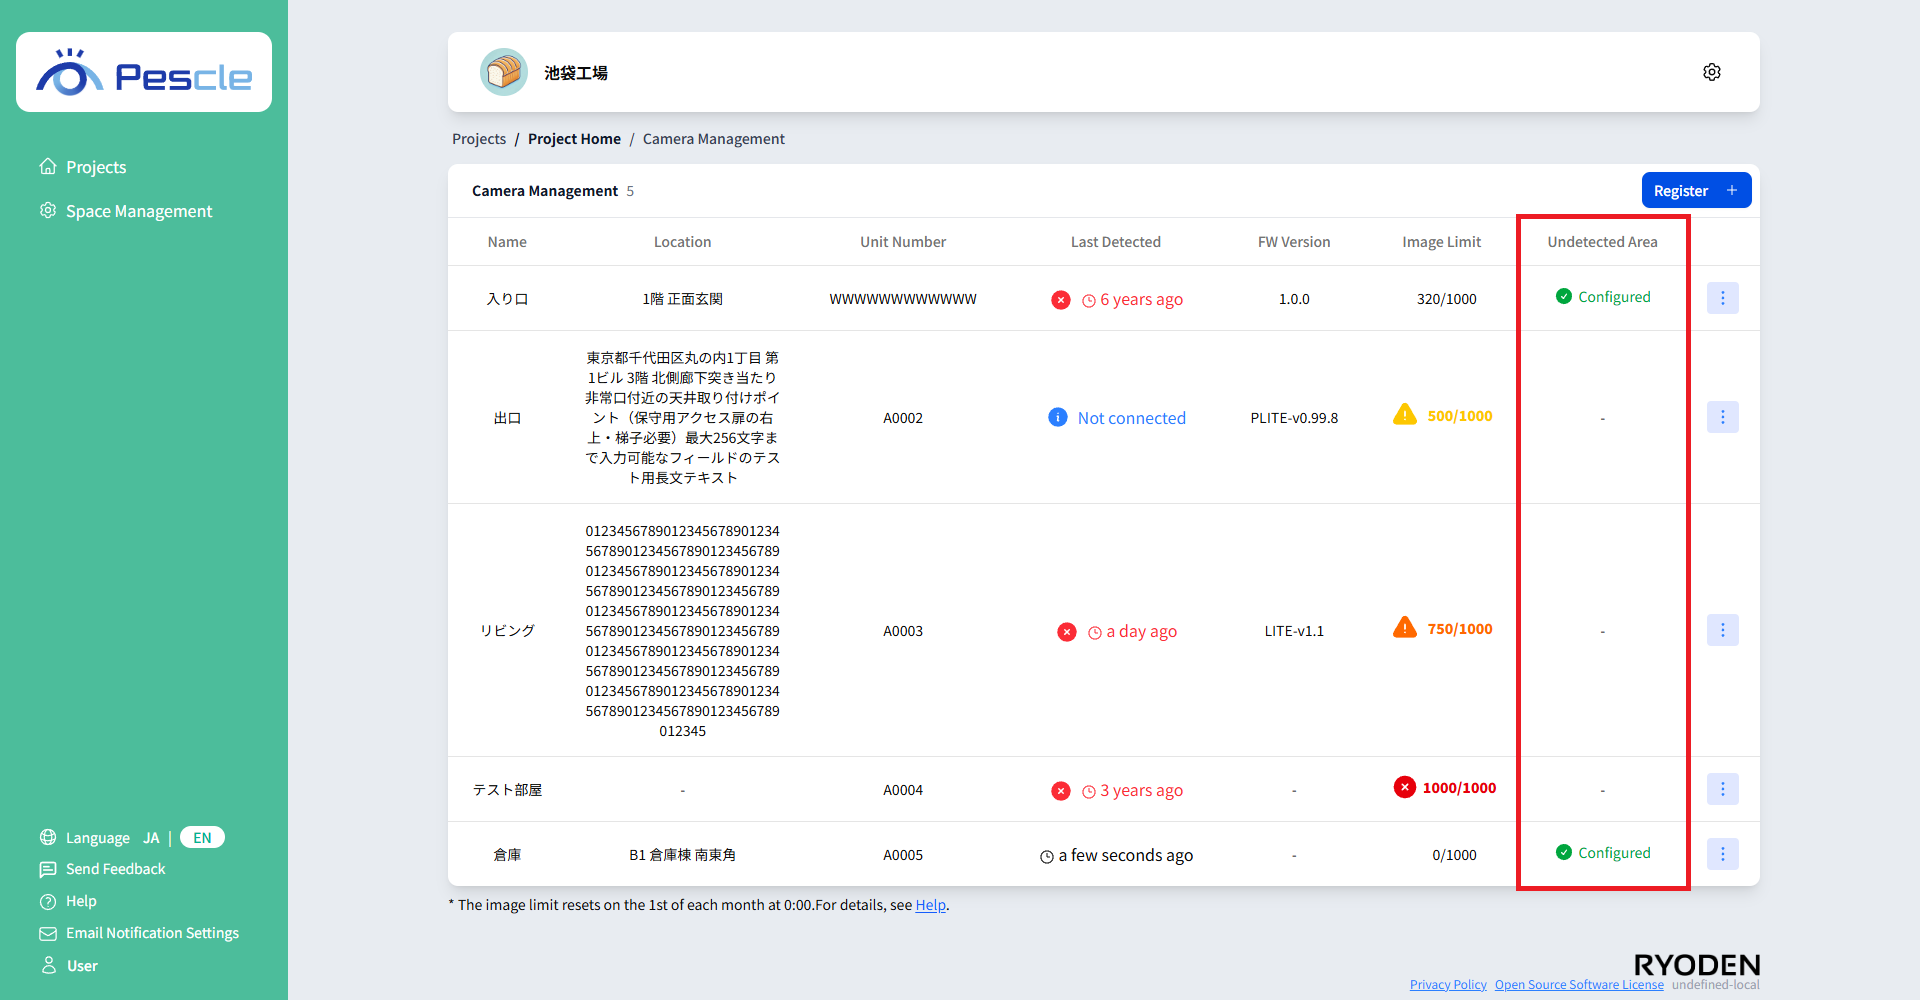
On the camera management screen, cameras that have been configured are shown as “Configured” under “Undetected Area”.